Setting Up Tip-Ups for Ice Fishing
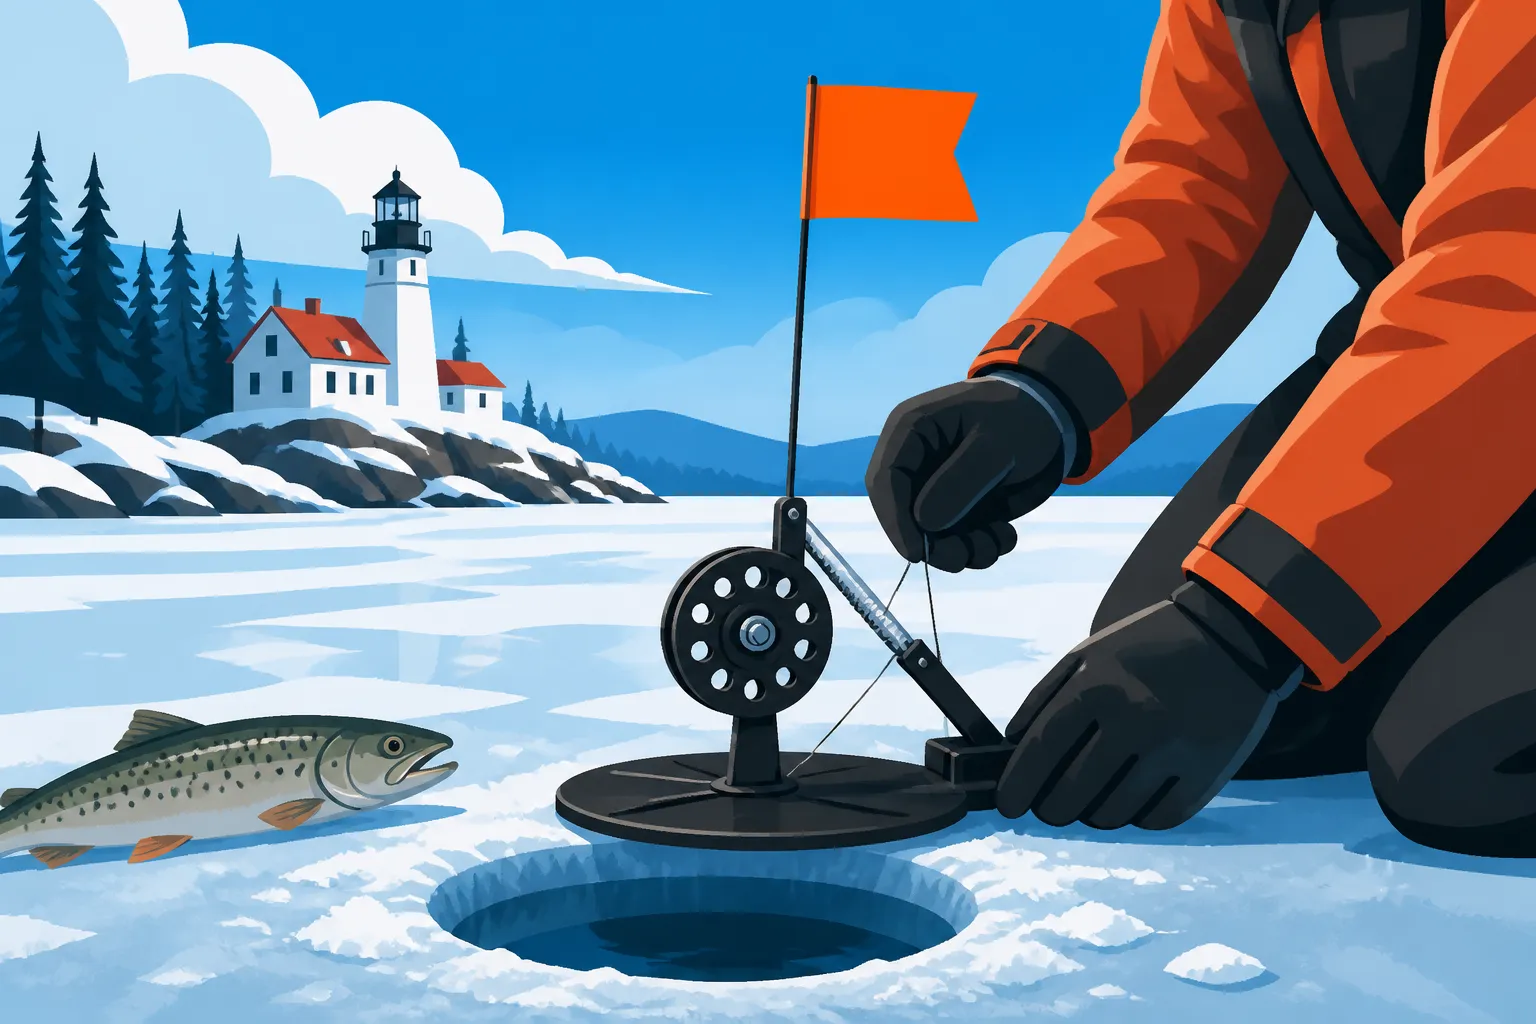
There’s nothing quite like the sight of that little red flag popping up against a stark white landscape. It’s a rush that every Maine ice angler lives for, signalling that something exciting is happening beneath the frozen surface. But if you’re new to the game, or even if you’ve dabbled a bit, setting up tip-ups can feel a little daunting. This guide is going to walk you through everything you need to know to properly rig and deploy your tip-ups, ensuring you’re ready for that next heart-stopping flag.
The Basics of Tip-Up Fishing: Why Bother?
Ice fishing isn’t always about jigging a tiny spoon until your arm aches. Sometimes, the most effective method, especially for those bigger, more cautious fish lurking in the depths, is a more patient approach. That’s where tip-ups come into their own, acting as silent sentinels waiting for the bite. They truly are a game-changer when it comes to maximizing your chances on the ice.
Understanding the "Passive" Advantage
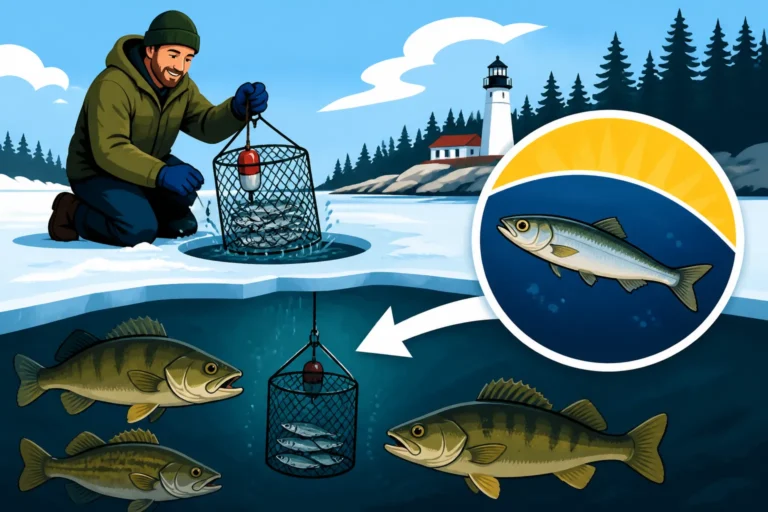
The biggest benefit of tip-up fishing is the ability to cover a wider area and present multiple baits simultaneously without constant manual effort. Imagine this: you've drilled a handful of holes, spread them out across a promising structure, and each tip-up is patiently holding a live baitfish, swimming naturally to entice a hungry predator. While one flag is up, you might be actively jigging another hole, or simply enjoying a hot cup of coffee in your ice shack. This "passive" advantage doesn't mean you're lazy; it means you're smart! You're increasing your odds by offering diverse presentations at varying depths or locations. Unlike jigging, where you’re constantly working a lure to attract attention, tip-ups allow your live bait to do the heavy lifting, presenting a much more natural, irresistible meal to the fish. It’s a testament to the power of subtlety and patience in the ice fishing world.
When and Where Tip-Ups Shine in Maine
Tip-ups truly excel when you're targeting those larger, sometimes more elusive, coldwater species that Maine is famous for. Think about the majestic lake trout, affectionately known as togue by us Mainers. They often cruise deeper water or patrol wide flats, and a lively baitfish suspended at the right depth can be exactly what it takes to tempt them. Landlocked salmon, especially in lakes like Sebago Lake or Moosehead Lake, are another prime target. They can be found suspended in the water column, and a well-placed tip-up with a struggling shiner can be irresistible. Even brook trout, particularly in some of our larger, deeper ponds, will readily take a bait from a tip-up.
This method is also fantastic for species like pickerel, which are ambush predators. A tip-up spread around weed beds or structure can quickly show you where these toothy critters are hiding. For more detailed information on specific species, check out our guide on How to Fish for Togue Through the Ice and Best Depth to Ice Fish for Brook Trout. The versatility of tip-ups makes them a staple for anyone looking to maximize their catch potential across a variety of Maine's diverse ice fisheries. Plus, let's be honest, standing around a bunch of flags with friends, waiting for that moment of excitement, is half the fun of a good ice fishing trip!
Essential Gear for Your Maine Tip-Up Spread
Before you even think about drilling a hole, you need to make sure you have the right tools for the job. Just like any type of fishing, having the correct gear can make all the difference between a successful, enjoyable day and a frustrating one. Don't skimp on the essentials, because the Maine winter can be unforgiving, and a faulty piece of equipment can quickly put a damper on your plans.
Choosing the Right Tip-Up Style
When you walk into a tackle shop or browse online, you'll quickly realize there's a whole world of tip-ups out there. Each style has its merits, and choosing the right one often comes down to personal preference, the type of fishing you do most, and frankly, what you can comfortably afford.
Traditional Wooden Tip-Ups: These are the classics, often made from hardwood, which gives them a substantial feel and excellent stability on the ice. Brands like Jack Traps are iconic in Maine, known for their craftsmanship and durability. They tend to be a bit heavier, which can be a pro (less likely to blow away in high winds) or a con (more to carry). Their stability is fantastic in windy conditions, and they often have larger spools, which is great for deeper waters or when targeting powerful fish that can make long runs. The larger footprint also helps keep the hole from freezing over as quickly.
Plastic/Polymer Tip-Ups: Lighter and generally more affordable, these are a popular choice for many anglers. They require less maintenance than wood, as they won't warp or crack with moisture. Many modern plastic tip-ups, like those from Frabill or HT Enterprises, feature clever designs for easy storage and transportation. While they might be lighter, some newer models have wider bases or integrated stability features to prevent them from being blown around by gusts of wind.
Thermal Tip-Ups: These are the unsung heroes on those brutally cold days. Designed with an insulated base that covers the entire ice hole, thermal tip-ups significantly reduce the rate at which your hole freezes. This means less time chiseling ice and more time fishing. They are particularly useful during extreme cold snaps or when ice fishing overnight. While often made of a durable plastic, their key feature is insulation. Some models even come with integrated lights for night fishing, which is a neat bonus.
Here's a quick comparison of popular tip-up types:
| Tip-Up Style | Pros | Cons | Best Use Case |
|---|---|---|---|
| Traditional Wood | Very stable, durable, large spool capacity, classic aesthetic | Heavier, requires more maintenance, can be bulky | Deep water, windy conditions, targeting big fish |
| Plastic/Polymer | Lightweight, affordable, low maintenance, easy to store | Less stable in high winds (some models), smaller spools | General use, mobile anglers, shallower water |
| Thermal | Prevents hole from freezing, often well-insulated | Can be bulkier, generally more expensive, still plastic | Extremely cold weather, overnight fishing, minimal hole maintenance |
Regardless of the style you choose, look for a model with a smooth-running spool that won't bind up when a fish takes line. A sensitive flag mechanism that triggers easily is also crucial, especially for light-biting fish. You can find a fantastic selection of all these types on websites like Amazon, often with helpful reviews from other ice anglers.
Line, Leader, and Terminal Tackle Choices
This is where the rubber meets the road, or rather, where your bait meets the fish. The right line and terminal tackle are critical for a successful hook-up and landing your catch.
Main Line: For tip-ups, most anglers opt for a heavy, low-stretch line that can withstand the cold and abuse of ice fishing.
- Dacron: This is a classic choice. It's strong, holds up well in cold temperatures, and has very little stretch, allowing for solid hooksets. Its stiffness helps prevent it from freezing to itself on the spool. Most common sizes range from 30 to 50 lb test.
- Braided Nylon: Similar to Dacron, it's durable and low-stretch. Some anglers find it handles slightly better than Dacron in extremely cold conditions.
You'll want to spool enough line to reach the deepest parts of the waters you fish, plus a good reserve. Having 50-100 feet more than the deepest spot is a good rule of thumb, just in case a big fish decides to make a long run.
Leader Material: This is the critical, often nearly invisible, connection between your main line and your hook.
- Fluorocarbon: The king of invisibility underwater. Fluorocarbon has a refractive index very close to water, making it incredibly difficult for fish to see. It’s also very abrasion-resistant, which is key when fishing around ice edges or rocky bottoms. Use a test strength appropriate for your target species; 8-20 lb is common for most Maine freshwater fish on tip-ups.
- Monofilament: More affordable and with a bit more stretch than fluorocarbon, mono can still be a good choice. Its stretch acts as a shock absorber, which can be useful when a powerful fish strikes hard. However, it's more visible than fluorocarbon and less abrasion-resistant.
Some anglers will even use a heavy, braided ice line for their leader if targeting toothy critters like pike or pickerel, or specialized bite leaders made of wire.
Swivels and Snaps: These small but mighty components serve several purposes.
- Barrel Swivels: Placed between your main line and leader, they prevent line twist, which can be a huge problem with lively baitfish spinning.
- Snap Swivels: These offer the same line-twist prevention but also allow for quick changes of your leader and hook setup without re-tying. Choose quality, dark-colored swivels to minimize visibility.
Hooks: The type and size of hook are crucial for both keeping your bait lively and securing your catch.
- Treble Hooks: Often preferred for live bait, trebles offer multiple points of contact, increasing the chance of a solid hook-up. Sizes #6 to #1/0 are common, depending on bait size and target fish.
- Single Hooks: Sometimes used for dead bait or when trying to minimize damage to baitfish for conservation purposes. A good quality, sharp Kahle or Octopus hook can be very effective.
Always opt for sharp hooks! Dull hooks lead to missed fish, and you don't want to lose that trophy because of a cheap hook.
Sinkers: These get your bait down to the desired depth.
- Split Shot: Small, pinch-on weights that can be easily added or removed to fine-tune your bait's descent.
- Egg Sinkers/Bullet Sinkers: These slide freely on the line above a swivel, allowing a fish to take the bait without immediately feeling the weight of the sinker. This "slip sinker" rig is popular for more sensitive fish.
For more on choosing the right line, check out our guide on Maine Ice Fishing Line Limits.
Live Bait and Baitfish Considerations
Ah, live bait! It's the secret weapon for many successful tip-up anglers. A frisky baitfish, swimming naturally, is often irresistible to hungry predators.
Common Maine Baitfish:
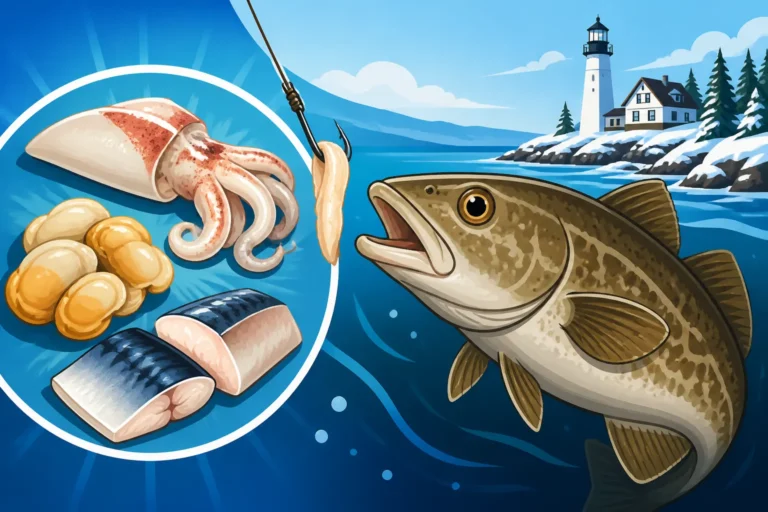
- Smelts: These are arguably the top choice for many Maine anglers, especially when targeting landlocked salmon and lake trout (togue). Their silvery flash and natural scent are deadly.
- Shiners: Golden shiners are hardy and active baitfish that work well for a variety of species, including bass, pickerel, and even larger brook trout.
- Suckers: Larger suckers are excellent for targeting bigger togue or pike. They are quite robust and can withstand being on the hook for extended periods.
- Chubs: Another good all-around baitfish.
Where to Get Them: Your best bet is always a local bait and tackle shop. They'll have fresh, lively bait that's legally harvested and often conditioned for local waters. Places like Indian Hill Trading Post in Greenville or Dag's Bait & Tackle in Auburn are great resources. Avoid bringing bait from out of state, as this is often illegal and can introduce invasive species.
Keeping Them Alive: This is paramount. A dead or lethargic baitfish isn't nearly as effective.
- Insulated Bait Bucket: Keeps water temperatures stable, preventing shock to the baitfish.
- Aerator: A battery-powered aerator is a must-have. It keeps the water oxygenated, crucial for keeping bait lively all day. You can find reliable aerators on Amazon or at any good outdoor retailer.
- Water Changes: If you're out for a very long day, or if your bait looks sluggish, consider refreshing the water with some fresh, cold lake water (if allowed and clean).
- Ice: A small amount of ice (made from non-chlorinated water) can help keep the bait water cool on warmer days, or prevent it from freezing too quickly in extreme cold.
Maine Regulations on Baitfish: It's absolutely crucial to know the rules. Maine has specific regulations about which baitfish species can be used in certain waters, and often restricts the use of wild-caught bait to prevent the spread of invasive species or disease. Always consult the Maine Department of Inland Fisheries and Wildlife (MDIFW) open water and ice fishing regulations for the current year. For a broader understanding of bait, check out our guide on Best Bait for Maine Ice Fishing.
Step-by-Step: Rigging Your Tip-Up for Success
Now that you have all your gear, it's time to put it together. Rigging a tip-up isn't rocket science, but doing it correctly will save you headaches on the ice and ensure you don't lose that monster fish when it finally bites. Pay attention to the details here, as they truly make a difference.
Spooling Your Line and Setting the Depth
Getting your line on the tip-up correctly and knowing your depth are foundational steps. Skimping here can lead to tangles or fishing too high or too low for the target species.
Spooling Your Main Line:
- Attach the Line: Start by tying your main line (Dacron or braided nylon) securely to the tip-up's spool. A simple arbor knot or an improved clinch knot works well.
- Wind Neatly: Wind the line onto the spool evenly and firmly. You want enough line to reach the deepest part of the body of water you're fishing, plus a generous reserve for long runs. For example, if you’re fishing a lake with depths up to 60 feet, spool at least 100-150 feet of line. This ensures you won't get spooled by a large fish and gives you flexibility for different spots.
- Secure the End: Once spooled, you can either tie a small loop at the end or use a small snap swivel to quickly attach your leader.
Setting the Depth: This is where you connect with the fish's world.
- Use a Depth Finder: The easiest way to find your exact depth is with a portable ice fishing sonar or flasher unit. Lower the transducer into the hole, and it will give you a real-time reading of the bottom and any fish suspended in the water column.
- Using a Weight: If you don't have a sonar, tie a small, heavy weight (like a jig or a dedicated depth-finding weight) to the end of your line. Lower it until it hits the bottom, then pinch a small split shot or indicator bobber onto your line at the water's surface to mark that depth. Reel up the weight and measure out your desired fishing depth from that mark.
- Adjusting for Fish: Once you know the bottom depth, consider your target species. Are you fishing right on the bottom for togue? Or suspended 5-10 feet off the bottom for salmon? Or perhaps just a few feet under the ice for cruising brook trout? Adjust your bobber stop or line marker accordingly.
- Setting the "Trip" Mechanism: This is the part that holds the flag down and releases it when a fish pulls the line. Most tip-ups have a simple tension adjustment. You want enough tension so the wind or your baitfish's natural movements don't trip the flag prematurely, but not so much that a fish has to pull excessively hard to trigger it. A good starting point is light tension, increasing it slightly if you get false flags. This requires a bit of trial and error and adapting to the conditions and target species.
Attaching Leaders and Hooks
The quality of your knots and the connection between your main line, leader, and hook are crucial. A weak knot can mean a lost fish.
Knots, Knots, Knots:
- Main Line to Swivel: Use a strong, reliable knot like an Improved Clinch Knot, Palomar Knot, or Uni Knot to attach your main line to a small, dark-colored barrel or snap swivel. These knots are well-proven for strength and reliability.
- Leader to Swivel and Hook: Again, the Palomar or Improved Clinch Knot are excellent choices for connecting your fluorocarbon or monofilament leader to the other end of the swivel and then to your hook. Make sure to moisten your knots with saliva before cinching them down tightly; this helps prevent line friction and weakening.
Leader Length:
- General Rule: A common starting point is a 2-foot to 4-foot leader.
- Water Clarity: In very clear waters, a longer leader (up to 6 feet) can be beneficial to keep the main line further from the bait, increasing stealth.
- Species Specifics: For toothy fish like pickerel or pike, you might consider a short wire leader or heavier fluorocarbon to prevent bite-offs, though this can sometimes deter more wary fish like salmon.
Swivel Placement:
- Always place a swivel between your main line and your leader. This is absolutely essential for preventing line twist, especially when using lively baitfish that love to spin. Without it, you'll quickly have a tangled mess that's difficult to manage, especially in cold weather.
Hooking Your Live Bait Properly
This step is arguably one of the most important for success with tip-ups. A well-hooked baitfish stays alive longer, swims more naturally, and is less likely to be spit out by a fish.
Through the Back (Behind the Dorsal Fin):
- This is the most common and often most effective method. Carefully insert the hook just behind the dorsal fin, making sure to go above the spine. The goal is to hook the baitfish through the tougher muscle tissue, not through the delicate spine, which would kill it quickly.
- Why it works: This method allows the baitfish to swim freely and naturally, appearing distressed or easy prey to a predator. It positions the hook perfectly for a fish approaching from below or behind.
Through the Lips (for less active or dead bait):
- If your bait is sluggish, or if you're using dead bait (which can be effective sometimes, especially for togue), hooking it through both lips from the bottom up can be a good option.
- Why it works: This rig is often used when jigging dead bait or when you want the bait to hang horizontally. It’s less ideal for keeping a lively baitfish active.
Important Considerations:
- Avoid the Spine: Hitting the spine will paralyze or kill your baitfish quickly, rendering it less effective. If you feel resistance that feels like bone, re-hook it.
- Keep it Lively: The whole point of live bait is its movement. Handle your baitfish gently with wet hands to minimize stress and scale loss. Get it into the water as quickly as possible.
- Hook Size: Match your hook size to your baitfish. A hook that’s too large will inhibit the bait’s movement and can be easily detected by fish. A hook that’s too small might not get a good bite into a larger fish.
- Presentation: Once hooked, gently lower your bait into the hole to the desired depth. Observe how it swims. If it's spinning excessively, your swivel might not be working, or the baitfish might be injured.
Remember, a lively, well-presented bait is often the key to triggering a bite on a tip-up. Taking a little extra time and care at this stage will pay dividends when that flag finally flies!
Strategic Tip-Up Deployment and Spacing on the Ice
Having your gear rigged is only half the battle. Knowing where and how to place your tip-ups on the ice is a strategic art that can drastically improve your success. Maine’s diverse lakes and ponds offer countless possibilities, but understanding fish behavior and using your available tools will help you narrow down the best spots.
Reading the Ice and Fish Finder for Placement
Just like open water fishing, success often comes down to understanding the underwater topography and where fish are likely to be holding or moving.
Finding Structure:
- Drop-offs: These are natural highways for fish, offering quick access to different depths for feeding or safety. Fish often patrol the edges of drop-offs.
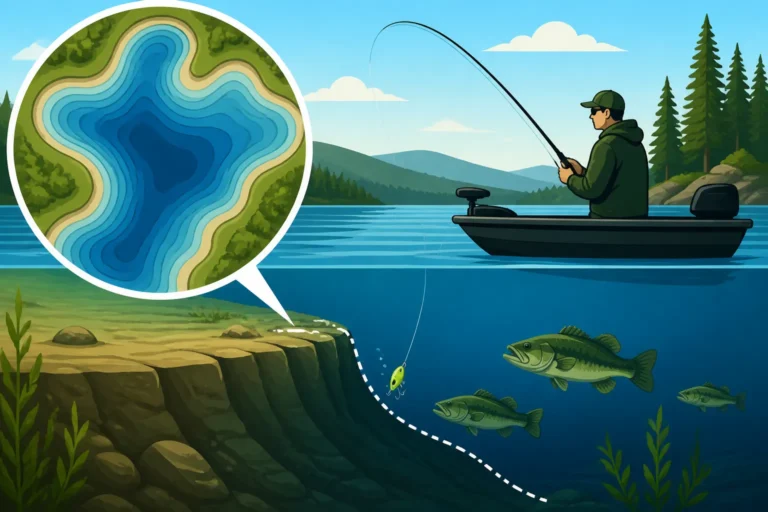
- Humps and Points: Underwater humps (rises in the lakebed) and points extending from shore are prime feeding grounds. Baitfish often congregate around these features, attracting predators.
- Weed Lines: Even under the ice, green weeds can hold oxygen and provide cover for baitfish and smaller predators. If you can find healthy weed growth, you'll likely find fish.
- Bottom Transitions: Look for areas where the bottom changes from soft mud to hard rock, or gravel. These transition zones often hold invertebrates and baitfish, making them attractive to game fish.
Using Sonar/Fish Finder:
- A portable fish finder or flasher unit is an invaluable tool for ice fishing. Before you even set up a tip-up, drill a hole and drop your transducer to scan the area.
- Locate Fish and Bait Balls: Your sonar will show you the bottom depth, but more importantly, it will reveal any fish suspended in the water column or hugging the bottom. Look for "arches" (individual fish) or dense "clouds" (baitfish schools).
- Identify Depth: This helps you confirm the depth you set on your tip-up. If you see fish consistently at 20 feet in a 40-foot basin, you'll want to set your bait at that 20-foot mark.
- Power Augers are Your Friend: You'll be drilling a lot of holes to "read" the ice. A good power auger, whether gas or electric, is worth its weight in gold. It makes exploring new spots quick and easy, saving your energy for fighting fish!
Optimal Spacing and Spreading Your Baits
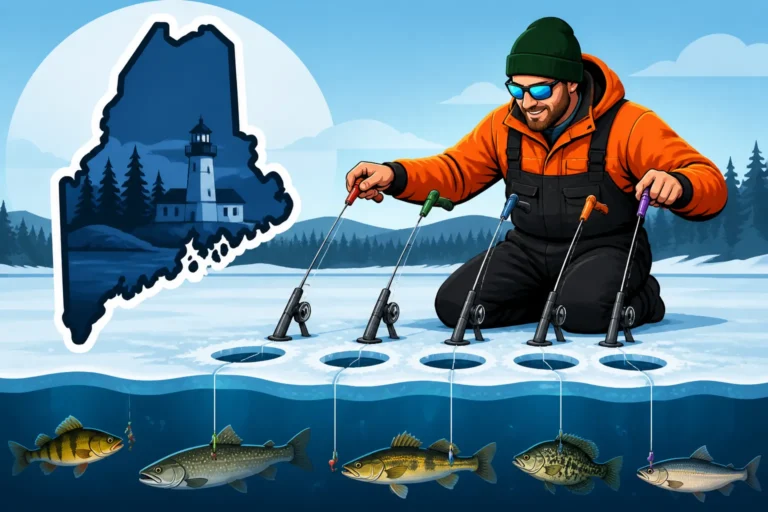
You're limited by regulations on how many lines you can fish, so you want to make each tip-up count. In Maine, the general rule is you can fish with up to five lines when ice fishing, unless otherwise noted in special regulations. For precise details, be sure to check our guide on How Many Lines Can You Ice Fish With in Maine?.
Covering Different Depths and Areas:
- Fan Pattern: A common strategy is to spread your tip-ups in a "fan" or "grid" pattern across a promising area. Don't put all your baits at the same depth or in the same spot.
- Depth Variation: If you're fishing a drop-off, place one tip-up shallow, one halfway down the break, and one near the bottom. This helps you identify the fish's preferred depth on that particular day.
- Structure Edges: If fishing a point or hump, place some tip-ups on top of the structure and others along its edges.
- Current and Flow: In areas with subtle current, like near inlets or outlets, consider how the water movement might influence baitfish and predator locations.
Avoiding Tangles:
- Mind Your Distance: While you want to cover ground, avoid placing tip-ups so close together that a fish on one could tangle with another line. Give them enough room to run.
- Known Hotspots: If you discover a specific, small hotspot, you might place two tip-ups relatively close, but still allowing enough space for a fish to fight without crossing lines.
Monitoring Your Tip-Ups and Setting the Hook
The moment of truth! A flag flying means action, but don't just run blindly. A little composure and proper technique can mean the difference between landing a fish and telling a "one that got away" story.
Staying Alert for Flags:
- Keep Eyes on Them: It sounds obvious, but especially on a sunny day or when distracted by conversation, it's easy to miss a subtle flag pop. Regularly scan your tip-ups.
- Wind and False Flags: Be aware of windy conditions. A gust of wind can sometimes trip a very sensitive flag. This is where proper tension setting comes in.
- The Run: When a flag goes up, don't immediately sprint to it. Observe the spool. Is it spinning rapidly, steadily, or has it stopped? A steady pull usually means the fish is running with the bait. If it stops, the fish might have dropped the bait or is simply holding it.
The "Wait and See" Moment:
- This is where patience is key. When you see a flag fly and the spool is turning, approach calmly but quickly.
- Let Them Eat: It’s often best to let the fish "take" the bait for a few seconds. Larger fish, especially togue and salmon, will often grab the bait, swim a short distance, and then turn it to swallow. If you yank too soon, you might pull the bait right out of their mouth.
- Feel the Weight: When the line stops moving, or you feel a consistent, solid pull when you gently lift the tip-up, it’s usually time.
Proper Hook Setting Technique:
- Grab the Line: Gently but firmly grasp the line between your fingers.
- Feel for the Fish: Slowly lift the line until you feel the weight of the fish.
- Set the Hook: Once you feel that solid resistance, give a firm, upward sweep of your arm. Don't jerk violently, but rather a strong, smooth pull to drive the hook home.
- Hand-Line the Fish: With tip-ups, you're usually hand-lining the fish in. Keep the line taut, take in line hand-over-hand, and be ready for any sudden runs. When the fish nears the hole, be extra careful, as this is often when they make a last-ditch effort to escape.
- Use a Gaffer/Landing Net: For larger fish, a gaffer or a wide-mouthed ice fishing net is essential to safely bring the fish onto the ice.
Avoiding Running and Tripping:
- The excitement of a flag can make anyone want to sprint, but slick ice and snow hide hazards. Walk, don't run!
- Clear the area around your holes of any unnecessary gear to prevent tripping. Safety first on the ice, always.
- For more general safety advice, check out Early Ice Safety Tips for Maine Anglers and Late Ice Safety Tips Before Ice-Out.
Mastering the Art: Advanced Tip-Up Tactics and Maine Specifics
Once you've got the basics down, you can start refining your approach. Ice fishing, especially with tip-ups, offers a lot of room for experimentation and adapting to conditions. Every lake and every day is a little different, and a true Mainer knows how to adjust!
Adjusting to Different Fish Species and Conditions
Different fish have different habits, and the weather plays a huge role in their behavior under the ice. Being able to adapt is key.
Togue (Lake Trout):
- Depth: Togue typically prefer deeper, colder water, especially as the winter progresses. Focus your tip-ups in basins, over deep humps, and along deep drop-offs. You might set your bait anywhere from 5-10 feet off the bottom to right on the bottom.
- Bait: Larger smelts or suckers are often preferred. Togue are opportunistic feeders and aren't shy about taking a substantial meal.
- Presentation: A lively baitfish on a slip-sinker rig works wonders. They often take their time with the bait, so a slightly longer "wait" after a flag goes up can be beneficial. Dive deeper into specific tactics with our How to Fish for Togue Through the Ice guide. Also, be mindful of Togue Size and Bag Limits in Maine.
Landlocked Salmon:
- Depth: Salmon are often more pelagic, meaning they cruise the open water. Look for them suspended in the middle of the water column, often chasing smelt schools. Early ice, they might be shallower, near tributaries or rocky points.
- Bait: Smelts are hands-down the best bait for salmon. A lively, active smelt will attract their attention.
- Presentation: Keep your bait relatively shallow, perhaps 10-25 feet down, or at the depth where you're marking baitfish on your sonar. Salmon are often aggressive hitters, but can be quick to drop the bait if they feel resistance.
- Don't forget to review Landlocked Salmon Size and Bag Limits in Maine before you head out.
Brook Trout:
- Depth: While some large lake brookies can be deep, river-run or pond brook trout often hug structure, old stream beds, or near points in shallower water. They can also be found cruising just under the ice, especially in low-light conditions.
- Bait: Smaller shiners or even minnows are excellent. Worms can also be surprisingly effective on tip-ups for brook trout.
- Presentation: Often set closer to the bottom, or just a few feet under the ice in smaller ponds. They have a softer bite, so a sensitive flag setting is crucial. For detailed insights on depths, refer to Best Depth to Ice Fish for Brook Trout. Also, make sure you know the Brook Trout Size and Bag Limits in Maine.
Weather Impact:
- Cold Fronts: After a strong cold front, fish can become lethargic and less active. You might need to scale down your bait size, fish slower, and be extra patient.
- Stable Weather: Stable, overcast days are often ideal for ice fishing, encouraging fish activity.
- Barometric Pressure: Many anglers believe rising or stable barometric pressure leads to better fishing, while falling pressure can shut fish down. Pay attention to weather patterns and adjust your expectations and strategy.
Safety and Regulations: Playing by Maine's Rules
Safety on the ice is paramount. No fish is worth risking your life. Beyond personal safety, knowing and following Maine's fishing regulations is non-negotiable. Game Wardens are out there, and ignorance of the law is no excuse.
Ice Thickness:
- The golden rule: minimum of 4 inches of clear, solid ice for individual foot travel. Double that for snowmobiles or ATVs (8-12 inches).
- Always check ice thickness with an auger or spud bar as you go, especially on new ice or unfamiliar waters. Ice can vary wildly even within a small area.
- Stay away from inlets, outlets, pressure ridges, and areas around beaver houses, as ice here is often much thinner. Read up on Early Ice Safety Tips for Maine Anglers and Late Ice Safety Tips Before Ice-Out for comprehensive information.
Shanty Rules:
- If you plan to use an ice fishing shack (shanty), you need to know the rules for marking it and when it needs to be removed. Each year, the MDIFW sets deadlines for shack removal, which are crucial to follow to prevent littering and navigational hazards. For all the specifics, consult Ice Fishing Shack Rules Before You Set Up in Maine.
Licensing:
- Every angler over the age of 16 needs a valid Maine fishing license, unless otherwise exempt (e.g., during Maine Free Fishing Days). Don't leave home without it! Our comprehensive Maine Fishing License Guide covers everything you need to know about purchasing and carrying your license.
Bag Limits and Size Restrictions:
- Maine has very specific rules for how many fish of each species you can keep, and minimum or maximum size limits for certain fish in specific waters. These regulations are designed to protect fish populations.
- Always consult the MDIFW regulations booklet (available online or at license agents) for the specific water you are fishing. These rules can vary by lake and even by zone within a lake (e.g., Maine North Zone vs South Zone Fishing Rules). Check out Maine Fish Bag Limits Guide for a general overview.
- If you're unsure, practice catch and release, or keep only what you're certain is legal.
Lead Tackle Ban:
- Maine has implemented a ban on the use of lead fishing sinkers and jigs that weigh one ounce or less. This is for environmental protection, particularly for loons and other waterfowl that can ingest lead. Make sure your small weights and jigs are made from lead-free alternatives like tungsten, steel, or bismuth. More information can be found in our Maine Lead Jig Fishing Ban article.
Troubleshooting Common Tip-Up Headaches
Even the most experienced anglers run into snags. Knowing how to quickly fix common issues will keep you fishing and prevent frustration.
Line Freezing in the Hole:
- Problem: On bitter cold days, the water in your hole can freeze, locking your line in place or preventing a flag from tripping.
- Solution: Use a skimmer to regularly clear ice from your hole. Consider using a thermal tip-up, which covers and insulates the hole. A small amount of non-toxic, biodegradable anti-freeze (specifically designed for fishing) can be used, but always check regulations and local guidelines before using any additives in the water.
Wind Tripping the Flag:
- Problem: A strong gust of wind can cause your flag to pop prematurely, leading to false alarms and wasted effort.
- Solution: Adjust the tension on your tip-up's flag mechanism. Make it slightly stiffer so it requires a more significant pull to trip. Some tip-ups also have wider bases or heavier designs that resist wind better. You can also place a small amount of snow around the base of the tip-up to anchor it.
Fish Spitting the Hook:
- Problem: You get a flag, get to the hole, but the fish is gone, or you miss the hookset.
- Solution: This often comes down to timing and hook sharpness. As discussed, let the fish "take" the bait for a moment before setting the hook. Ensure your hooks are razor-sharp. If you're consistently missing fish, try a different hook style (e.g., switching from a single to a treble) or a slightly smaller hook if the fish seem finicky.
Tangles and Knots:
- Problem: Line twist from lively bait, improper storage, or a poorly executed retrieve can lead to frustrating tangles.
- Solution: Always use a good quality barrel or snap swivel between your main line and leader to prevent line twist. When reeling in line by hand, try to keep it neat and organized, either coiling it on the ice next to your hole (careful not to step on it!) or on a line caddy. When done fishing, store your tip-ups with the line neatly spooled to prevent knots during transport. If you get a tangle, take your time and gently work it out, rather than yanking and making it worse.
Maintaining Your Tip-Up Gear for Longevity
Your tip-ups are an investment, and like any fishing gear, they'll last much longer and perform better with proper care. A little attention after each trip and a thorough check before the season starts can prevent frustrating gear failures on the ice.
Cleaning and Storage After Each Trip
It's easy to just toss your gear in the truck after a long day of fishing, but taking a few minutes to clean up can save you money and headaches in the long run.
Rinsing Off Ice, Mud, and Slime:
- As soon as you get off the ice, or definitely once you're home, give your tip-ups a good rinse with fresh, cool water. This washes away any ice slush, mud, fish slime, and bait residue that can accumulate. These substances, if left on the gear, can attract pests, promote bacterial growth, or simply make your gear sticky and unpleasant to handle.
- Pay special attention to the spool, shaft, and trigger mechanism. Fish slime is particularly corrosive and can gum up moving parts.
Drying Thoroughly to Prevent Rust and Mildew:
- After rinsing, it is absolutely crucial to dry your tip-ups completely. Hang them in a well-ventilated area, like a garage or basement.
- Wood Tip-Ups: If you have traditional wooden tip-ups, ensure they dry thoroughly to prevent warping, cracking, or the growth of mold and mildew. Proper drying will preserve the wood and its finish.
- Metal Components: Many tip-ups have metal springs, screws, or spool shafts. Drying prevents rust, which can seize up moving parts and weaken components.
- Line: Your Dacron or braided line can hold moisture. Ensure it's dry to prevent mildew, which can degrade the line over time. Don't store tip-ups in a damp, sealed container where moisture can get trapped.
Lubricating Moving Parts:
- Once dry, apply a light coat of a water-resistant lubricant (like a silicone spray or a fishing reel oil) to the moving parts. This includes the shaft the spool spins on and the spring mechanism that triggers the flag.
- Lubrication ensures smooth operation, prevents corrosion, and keeps your flag sensitive and reliable. Just a drop or two is usually enough – you don't want to over-lubricate and attract dirt.
Pre-Season Inspection and Repairs
Before the ice even forms, give all your tip-ups a thorough once-over. This proactive approach will mean fewer surprises when you're out in the cold.
Checking Line for Nicks and Abrasions:
- Go through each tip-up and inspect the entire length of line, especially the first 10-20 feet. Look for any nicks, fraying, or weak spots. Ice can be abrasive, and fighting fish can put a lot of strain on the line.
- If you find any damaged sections, strip them off, or better yet, replace the entire line on the spool. A fresh spool of line every couple of seasons (or more often if you fish a lot) is a smart investment. You can find quality bulk line on Amazon, which often makes it more cost-effective to re-spool all your tip-ups.
Testing Flag Mechanisms:
- Engage the flag mechanism and gently pull on the line to simulate a fish strike. Does the flag pop up reliably? Is it too stiff or too sensitive?
- Adjust the tension as needed. If the spring is weak or bent, see if it can be replaced. Many tip-up brands sell replacement parts.
Replacing Worn Parts:
- Check all screws, nuts, and bolts. Are any loose or rusted? Tighten or replace them.
- Inspect the spool itself. Is it cracked or damaged? Is the shaft bent?
- Look at the entire frame of the tip-up. Are there any cracks in plastic models or splinters/rot in wooden ones? Repair or replace as necessary.
Organizing Tackle:
- Take the opportunity to organize your tip-up terminal tackle: hooks, swivels, leaders, and weights. Replenish anything that's running low. Make sure all your bait buckets are clean, and your aerators are working with fresh batteries.
- Having a dedicated tackle box or bag for your tip-up essentials will make setting up on the ice much smoother.
By performing these simple maintenance steps, your tip-ups will be ready for action whenever the ice calls, ensuring you're prepared for that next exciting flag!
Disclaimer
The information provided in this guide is for general informational purposes only and does not constitute legal or professional advice. Fishing regulations, ice conditions, and safety recommendations can change rapidly. Always consult the official Maine Department of Inland Fisheries and Wildlife (MDIFW) regulations for the current year, check local ice conditions, and prioritize safety above all else. The author and publisher are not responsible for any accidents, injuries, or legal consequences resulting from the use of this information.