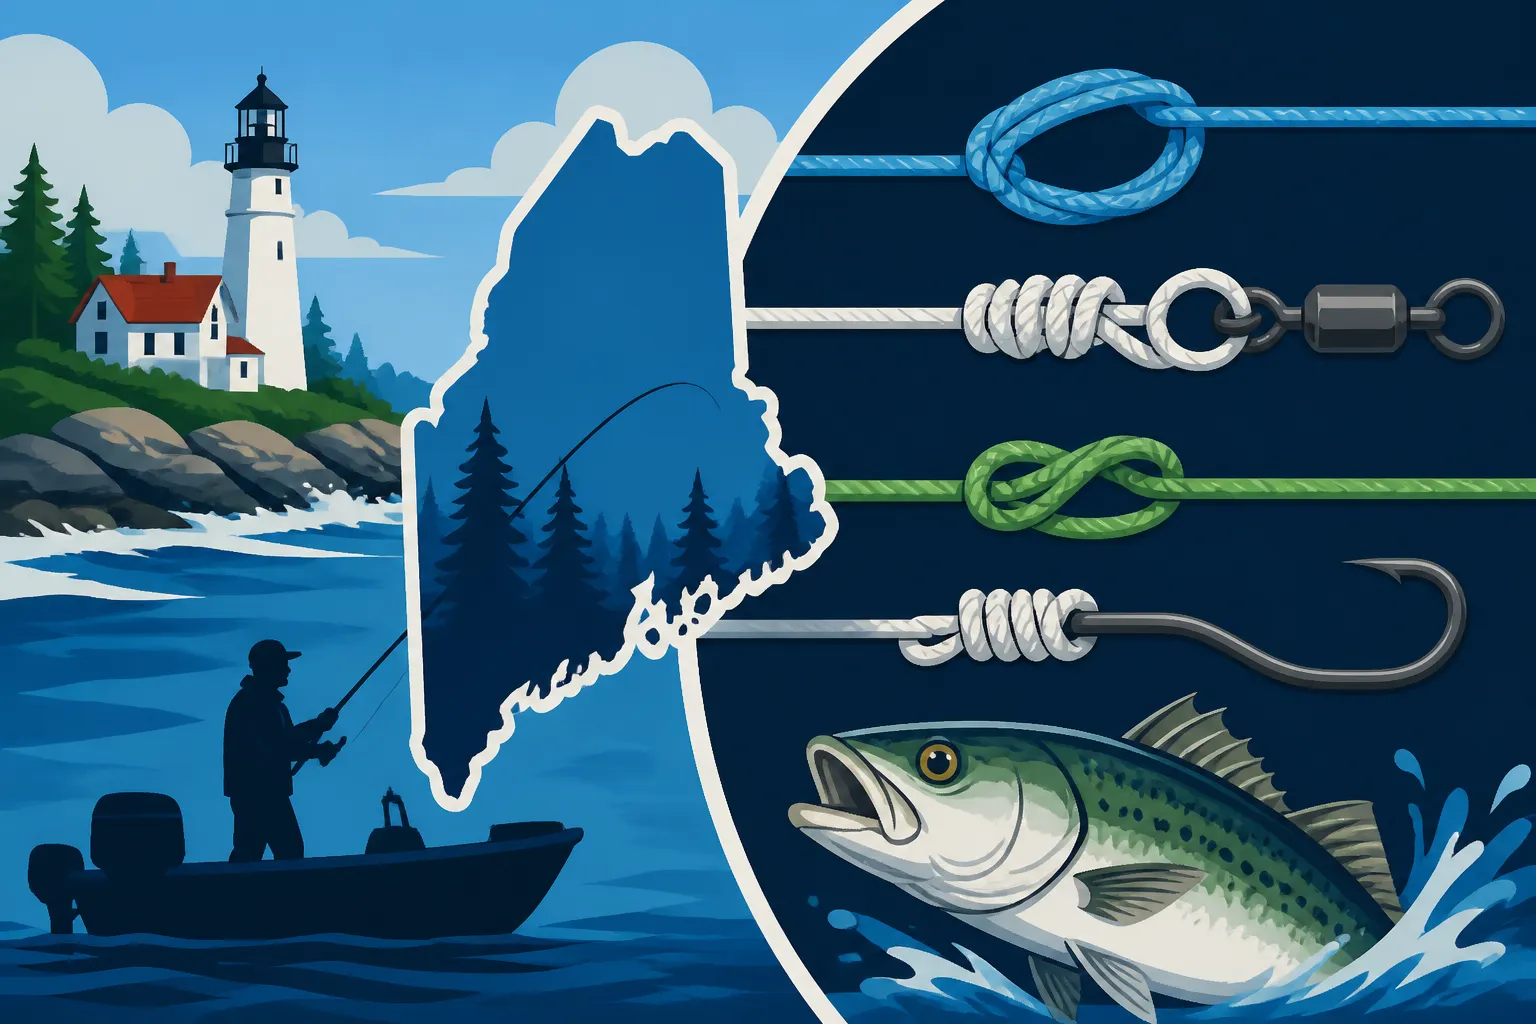
Fishing Knots Every Maine Angler Should Know
There’s nothing quite as frustrating, or soul-crushing, as feeling that powerful tug on your line, fighting a fish that feels like a true Maine trophy, only for your line to go slack. That sickening feeling in your gut? We’ve all been there. Often, the culprit isn't a faulty reel or a weak rod, but a knot that failed under pressure. This comprehensive guide will walk you through the essential fishing knots every angler needs to master for success on Maine’s diverse waters, ensuring your line holds strong when it matters most.
Why Trustworthy Knots Are Non-Negotiable in Maine Fishing
Maine's fishing landscape is a world of its own, offering everything from vast, deep lakes like Moosehead and Sebago, to winding rivers teeming with brook trout, and a rugged coastline where stripers patrol the rocky shores. Each environment presents its own challenges, and the fish themselves are renowned for their fighting spirit. A weak knot isn't just an inconvenience here; it can be the difference between a lifetime memory and a story of "the one that got away."
The Maine Fishing Environment Demands Strong Knots
Picture this: you're out on a crisp fall morning, trolling for landlocked salmon on Rangeley Lake, a truly iconic Maine experience. The water is cold, the fish are aggressive, and when one hits, it hits hard. Or maybe you're ice fishing in the dead of winter, jigging for togue on a deep Aroostook County lake, and you feel that unmistakable heavy pull. In these moments, your knot is the only thing connecting you to that fish. Maine's fish species, from powerful striped bass in coastal waters to the acrobatic landlocked salmon in freshwater, are known for their strong runs and head shakes. They put immense strain on your tackle, and a poorly tied knot simply won't stand a chance.
Beyond the fish, the environment itself can be tough on your line and knots. Submerged rocks, fallen trees, and even ice abrasion during winter fishing can compromise line integrity. A strong, properly tied knot minimizes weak points, allowing your line to perform as intended. Considering the various types of fishing, from light tackle brook trout fishing in a stream to heavy-duty deep sea trolling, the right knot is paramount. You wouldn't use a knot meant for light leader on heavy braided line when targeting a large muskie (if they were native to Maine!), and understanding the nuances is key.
The Heartbreak of a Lost Fish
Every angler has a story of a lost fish, and many of those stories end with the bitter realization that a knot failed. It’s not just the physical loss of the fish; it’s the mental anguish, the "what ifs," and the sting of disappointment. Maybe it was a personal best brook trout, a massive landlocked salmon that would have topped the derby leader board, or a striped bass that gave you the fight of your life. The memories of the fight linger, but the photo of the trophy fish remains a dream.
The frustration is compounded when you’ve invested time, effort, and money into your trip. You’ve woken up before dawn, navigated tricky waters, and endured challenging weather conditions, all for that moment of connection. To lose that moment because of a preventable knot failure is truly disheartening. That’s why taking the time to learn and practice a few reliable knots is an investment that pays dividends in confidence and successful catches, reducing the frequency of those heartbreaking stories.
Essential Knots for Tying Line to Lure or Hook
When it comes to connecting your fishing line directly to your lure, hook, or swivel, you need knots that are strong, reliable, and relatively easy to tie, especially when your fingers are cold or wet. These knots are your primary connection to the fish, so their integrity is paramount.
The Palomar Knot
The Palomar Knot is often lauded as one of the strongest and most reliable knots for connecting line to hooks, swivels, or lures. Its double-line structure provides exceptional strength and resistance to slippage, making it a favorite among anglers for a wide variety of fishing situations. It's particularly effective with braided lines, which can be notoriously slippery with other knots.
To tie a Palomar Knot, start by doubling about six inches of line and passing the loop through the eye of your hook or lure. If the eye is too small, you can pass a single line through, then double it back to create a loop, though this can slightly reduce strength. Next, tie a simple overhand knot with the doubled line, making sure the hook or lure hangs loosely in the loop. Pass the loop over the hook or lure, bringing it down around the entire assembly. Finally, pull both ends of the main line evenly and steadily, moistening the knot with saliva or water as you pull it tight. Snip the tag end close, leaving just a tiny bit for security. It feels a bit strange at first, but with practice, it becomes second nature. Many anglers keep a small, compact multi-tool or a pair of fishing forceps, which you can easily find on Amazon, to help grip and pull knots tight, especially with braided line.
The beauty of the Palomar is its simplicity in concept once you get the hang of it, and its remarkable strength. It’s a great choice for tying on anything from small trout flies to large striped bass lures. However, its main drawback can be threading the doubled line through very small lure eyes, which can be a fiddle. For those instances, an Improved Clinch might be a better choice. But for sheer stopping power, especially with stronger, feisty fish that Maine is famous for, the Palomar is a go-to.
The Improved Clinch Knot
The Improved Clinch Knot is a classic for a reason: it's relatively easy to learn, versatile, and offers good strength, particularly with monofilament and fluorocarbon lines. While it might not hold up quite as well as a Palomar with braided line, it’s an excellent choice for many situations and is a staple in many anglers' arsenals.
To tie an Improved Clinch Knot, begin by threading the tag end of your line through the eye of your hook or lure. Bring the tag end back and wrap it around the standing (main) line about five to seven times. The number of wraps can vary depending on the line type and diameter – more wraps for thinner line, fewer for thicker. After wrapping, thread the tag end back through the first loop you created right next to the eye. Then, critically, thread it through the larger loop that was just formed by the wraps. This "improvement" is what locks the knot in place. Moisten the knot, then slowly and steadily pull on the main line while holding the tag end and the lure. Trim the tag end cleanly.
This knot is a fantastic all-rounder. It's often the first "proper" knot many anglers learn because of its straightforward steps. It’s excellent for tying on jigs when you're ice fishing, or attaching a small spinner for brook trout in a mountain stream. Its main weakness is a slight reduction in strength compared to the Palomar, and it can be prone to slipping if not tied meticulously, especially with very slick lines like some fluorocarbons or braids. However, for everyday open water fishing for trout and bass with mono or fluoro, it's a perfectly capable and reliable knot that you'll use time and time again.
The Uni Knot
The Uni Knot, sometimes called the Grinner Knot, is incredibly versatile and strong, making it another favorite for tying line to terminal tackle. Its strength comes from the way it cinches down evenly, and its adaptability means it can be used for a variety of connections, not just lure to line. It's particularly good for connecting different lines and for tying to reel spools, making it a true utility player in your knot repertoire.
To tie a Uni Knot to a lure or hook, thread the line through the eye of the hook, then double the tag end back, running it parallel to the main line. Form a loop with the tag end, wrapping it around both the main line and itself about six to eight times. Pass the tag end through this loop with each wrap. Once you have your wraps, pull the tag end to cinch this wrapped loop down, forming a tight coil around the main line. Moisten the knot, then pull the main line firmly to slide the knot down to the eye of the hook, and then pull tight to fully secure it. Trim the excess tag end.
The Uni Knot’s biggest advantage is its adaptability. You can use it to tie on your favorite crankbait when targeting smallmouth bass in Sebago Lake, or for a worm hook when fishing for largemouth bass. You can also use a variation of it, the Double Uni Knot, for connecting two lines of similar or even slightly dissimilar diameters, which we'll cover next. While it might consume a bit more line than an Improved Clinch due to the wraps, its overall strength and consistent performance across various line types, including braided, monofilament, and fluorocarbon, make it an invaluable knot. It’s one of those knots that, once learned, you’ll find yourself relying on frequently.
Crucial Knots for Connecting Two Lines Together
Sometimes, you need to connect two separate pieces of line. This might be to create a longer leader for shy fish, to add a different type of line (like a fluorocarbon leader to a braided mainline), or simply to repair a break without having to re-spool your entire reel. These knots are essential for building reliable line systems.
The Blood Knot
The Blood Knot is a legendary connection knot, celebrated for its incredible strength and exceptionally small, streamlined profile. When tied correctly, it's often stronger than the line itself and can pass through rod guides smoothly, making it ideal for connecting two lines of similar diameter, such as monofilament to monofilament, or fluorocarbon to fluorocarbon. It's a bit more challenging to master than some other knots, but the effort is well worth it for its robust performance.
To tie a Blood Knot, overlap the ends of the two lines you wish to connect, running them parallel for about six inches. Take the tag end of the first line and wrap it around the second line (and itself) about five or six times, moving towards the bend. After the wraps, pass this tag end back through the gap created where the two lines first overlapped. Hold this in place. Now, take the tag end of the second line and wrap it around the first line (and itself) the same number of times in the opposite direction. Pass this second tag end back through the same central gap from the opposite direction. You should have two tag ends exiting the center of the wraps, pointing away from each other. Moisten the entire knot generously, then slowly and firmly pull on both standing lines simultaneously. Watch the coils tighten neatly against each other. Once tight, trim both tag ends very close.
The Blood Knot is particularly useful when you need a strong, subtle connection, like when you're tying a leader for wary fish in clear Maine waters. It's fantastic for fly fishing leaders where smooth casting is critical. However, its primary drawback is its difficulty, particularly with lines of very different diameters or with stiff fluorocarbon. If you’re trying to connect braided line to monofilament, you'll want to choose a different knot, as the braid will likely slip. But for line-to-line connections of similar material and diameter, it's hard to beat the Blood Knot for strength and a clean finish.
The Double Uni Knot
The Double Uni Knot is a highly popular choice for connecting two lines of varying diameters or materials, making it incredibly versatile for Maine anglers. It's a more forgiving knot than the Blood Knot, easier to tie, and still offers excellent strength, especially when you need to connect a braided mainline to a monofilament or fluorocarbon leader. This is a common setup for many types of fishing, from bass to salmon, providing the benefits of a strong, no-stretch braided main line with the stealth of a less visible leader.
To tie a Double Uni Knot, first, overlap the ends of the two lines you want to join. Take the tag end of the first line and lay it parallel to the second line. Form a loop with this tag end and tie a standard Uni Knot around the second line (and itself), making about five to six wraps through the loop. Cinch this first Uni Knot down, but don't pull it completely tight yet; it should slide freely on the second line. Now, take the tag end of the second line and repeat the process: form a loop, wrap it around the first line (and itself) five to six times, and cinch it down so it slides freely on the first line. You now have two separate Uni Knots, each wrapped around the opposing standing line. Moisten both knots, then simultaneously pull on the two main lines. The two Uni Knots will slide together and butt up against each other, forming a single, strong connection. Trim both tag ends closely.
This knot is a lifesaver when you're trying to achieve a low-visibility leader with the sensitivity and strength of braid. For example, when you're fly fishing for trout and need a long, light tippet, or when you're trolling with a braided mainline and want a fluorocarbon leader for better lure presentation to landlocked salmon. While the Double Uni Knot does create a slightly larger knot profile than a perfectly tied Blood Knot, its reliability and ease of tying, even with cold hands, often make it the preferred choice for many anglers, allowing them to quickly adapt their setup.
The Albright Knot
When you need to connect two lines of significantly different diameters or materials, especially a thick, stiff main line to a much thinner, more supple leader, the Albright Knot is a fantastic option. It's particularly favored for connecting heavy fly line to backing, or a stout braided line to a much finer monofilament or fluorocarbon leader, like when trying to present a small bait to wary fish. Its compact, strong design makes it a favorite among experienced anglers.
To tie an Albright Knot, start by forming a loop at the end of the thicker or stiffer line (let's call this the "main line"). Hold this loop open. Take the thinner line (the "leader") and pass its tag end through the loop. Wrap the leader's tag end around the doubled main line, working from the point where it entered the loop, for about 10-12 tight wraps back towards the bend of the main line's loop. After these wraps, pass the leader's tag end back through the main line's loop, entering from the same side it initially exited. Moisten the knot thoroughly. Slowly pull the main line's tag end (if it has one) and the main line itself to tighten the loop around the leader wraps. Then, pull the leader's standing line and the main line to fully cinch the knot tight. Trim both tag ends very close to the knot.
The Albright Knot shines in situations where you might be connecting a heavy main line for bottom fishing to a lighter leader for a specific presentation, or when you're building a leader for larger game fish. It’s also commonly used by fly anglers to connect their fly line to their backing. Its primary strength lies in its ability to securely join lines that might otherwise slip with simpler knots. The key to its success is making sure the wraps are tight and even, and that the knot is thoroughly moistened before cinching down. While it requires a bit of practice to get right, mastering the Albright will open up a world of rigging possibilities, ensuring your connections hold strong against anything Maine's waters throw at you.
Specialized Knots for Leaders and Loops
Beyond connecting lines directly to lures or to each other, there are times you need to create a reliable loop in your line or a specialized dropper for multiple presentations. These knots add versatility to your rigging, allowing for various fishing techniques and setups.
The Surgeon's Loop
The Surgeon's Loop is a wonderfully simple yet incredibly strong knot for creating a loop at the end of your line or leader. Its ease of tying makes it a go-to for many anglers, especially when tying drop-shot rigs, adding a loop to quickly attach a pre-tied leader to a swivel, or even creating a loop to secure your fishing line to a boat cleat. For Maine anglers, it's invaluable for swiftly setting up versatile rigs.
To tie a Surgeon's Loop, simply double your line to create a section of two parallel lines. You can make this section as long as you need the final loop to be. With these two parallel lines, tie a simple overhand knot. This means passing the doubled line through the loop you just created, essentially tying an overhand knot with two strands of line instead of one. For added security and strength, pass the doubled line through the overhand knot a second time. Moisten the knot with saliva or water, then pull all four strands (the two main lines and the two tag ends of the doubled section) evenly and firmly to cinch the knot down. Trim the tag end of the loop, leaving a small stub.
This knot is a workhorse. Need to quickly make a loop for a snap swivel? Surgeon's Loop. Building a dropper rig for multiple flies or baits? Surgeon's Loop. Its reliability and ease of tying, even in less-than-ideal conditions, make it an essential knot for any Maine angler. You'll find it incredibly useful whether you're rigging up for bass fishing in the Belgrade Lakes, or preparing a quick leader for brook trout in a mountain pond. The simplicity means less time fumbling with complex knots and more time fishing.
The Perfection Loop
While the Surgeon's Loop is excellent, the Perfection Loop offers a more compact and incredibly strong non-slip loop, making it particularly favored by fly anglers for creating loops on leaders and tippets that won't slip under pressure. It's also excellent for forming loops on the end of spinning or casting leaders where you want a very clean and strong connection for attaching to another loop, a swivel, or a snap.
To tie a Perfection Loop, hold the tag end of your line and form a small loop (let's call it Loop 1). Then, bring the tag end around Loop 1 to create a second, slightly larger loop (Loop 2) that overlaps Loop 1. Now, take the tag end and pass it behind both Loop 1 and Loop 2, then bring it back through Loop 1, but in front of Loop 2. It sounds a bit like a tongue twister, but it creates a distinct pattern. Hold the intersection firmly with one hand. With your other hand, pull on the standing line while simultaneously drawing Loop 2 through Loop 1. Moisten the knot, then pull slowly and firmly on the standing line to tighten the knot completely. Trim the tag end close.
The compact nature of the Perfection Loop means it flows smoothly through rod guides, which is crucial for sensitive presentations, especially when fly fishing. It forms a perfectly aligned loop that won't distort under strain, making it a reliable choice for attaching leaders to fly lines or for creating quick-change options for your terminal tackle. While it might take a couple of attempts to get the sequence down, its strength and clean presentation make it a superior choice for many loop applications, particularly when precision and strength are paramount.
The Dropper Loop
For those times when you want to present multiple baits or lures at different depths, or just spread out your offering, the Dropper Loop is your best friend. This knot creates a standing loop (a loop that sticks out from the main line) directly in your leader or main line, allowing you to attach a separate snelled hook, fly, or a small weight. It’s an incredibly effective way to fish multiple presentations simultaneously, which can be advantageous when targeting schooling fish or trying to identify what depth fish are holding at.
To tie a Dropper Loop, first, pinch a section of your line to create a small "S" shape. This will be the area where your loop is formed. At the center of the "S," twist the two strands of line together several times, creating a small twisted section. The number of twists depends on your line strength and how stiff you want the standing loop. After twisting, take the original loop of the "S" and pass it through the center of the twisted section. This might feel a bit awkward at first. Moisten the entire knot, then pull gently on both ends of the main line while simultaneously pulling on the small loop that you just passed through. This will tighten the twists and form a firm, standing loop. Trim any excess tag end if you've done this with a single line (which is less common than doing it in a leader section).
The Dropper Loop is immensely helpful for various Maine fishing scenarios. Imagine you’re perch fishing, and you want to present two small jigs or baited hooks at slightly different depths to maximize your chances. Or perhaps you’re trying to tempt brook trout with a tandem fly rig. This knot allows you to customize your setup with ease, giving you an edge in active fishing situations. It's a versatile knot that, once mastered, adds a significant tool to your rigging toolkit, enabling you to experiment with presentations and potentially catch more fish.
Knot Tying Tips and Best Practices for Maine Anglers
Knowing how to tie a knot is just one piece of the puzzle. Knowing how to tie it well and understanding the best practices for maintaining its integrity is equally crucial. These tips will help ensure your knots perform optimally, reducing frustrating break-offs and increasing your chances of landing that fish of a lifetime.
Wet Your Knots
This might sound like a minor detail, but it's one of the most critical steps in tying any monofilament or fluorocarbon knot. Before cinching a knot down tightly, you absolutely must moisten it. Whether with saliva, water from the lake, or even a specialized knot-tying lubricant, wetting the knot prevents friction burn. When dry line rubs against itself under tension, it generates heat. This heat can weaken the line significantly, sometimes by as much as 50% or more, creating an invisible weak point that will undoubtedly fail when you least expect it.
Moistening the line allows the coils of the knot to slide into place smoothly and evenly, distributing the tension properly and maintaining the line's full strength. This is especially important for lines like fluorocarbon, which can be more prone to friction damage due to its stiffer, less forgiving nature. So, make it a habit: every knot, every time, give it a little spit or dip before you pull it tight. It’s a simple action that has a profound impact on the reliability of your fishing setup and could save you from the disappointment of a lost fish.
Practice Makes Perfect
Let's be honest, tying knots perfectly under ideal conditions is one thing. Tying them quickly and correctly when you're out on a choppy lake, with cold, numb fingers, in fading light, and a fish is actively breaking on the surface, is another entirely. The only way to build that muscle memory and confidence is through consistent practice. Don't wait until you're on the water to try a new knot for the first time.
Take a few feet of your actual fishing line and practice tying each knot repeatedly at home. Do it while watching TV, do it with your eyes closed, do it with one hand (just in case!). The goal is to make the process second nature. This repetition will build the dexterity and confidence you need to tie strong, reliable knots efficiently, even when conditions are less than perfect. You might even consider investing in a small knot-tying tool, or a pair of magnifiers available on Amazon, to help you see the finer details when you're learning. The time you spend practicing off the water will pay off exponentially when you're actually fishing and need a dependable knot in a hurry. Understanding important regulations, such as Maine Open Water Line Limits, is just as crucial as having your knots perfected.
Trimming Tag Ends and Line Management
Once your knot is tied and cinched down, the next critical step is to properly trim the tag end. A tag end that’s too long can catch on weeds, debris, or even other lines, leading to frustrating tangles and potentially spooking fish. More importantly, an excessively long tag end can be a weak point, causing the knot to unravel or slip under strain. Conversely, trimming the tag end too short, right up against the knot, can also be problematic. If the line shifts even slightly under tension, the knot could unravel or slip free.
The sweet spot is usually leaving about 1/8 to 1/4 inch of tag end, depending on the knot and line type. This provides enough line for the knot to settle without being so long that it causes issues. Use a sharp pair of line clippers or small scissors (many multi-tools or specific fishing nippers you can find on Amazon are perfect for this) to get a clean cut. Avoid using your teeth, as this can damage the line, making it fray and weakening the integrity of the knot. Proper line management extends beyond the knot itself; ensuring your reel is properly spooled and free of twists, and checking your line for nicks and abrasions regularly, are all part of maintaining a strong, reliable connection to the fish. Also remember that for Maine Ice Fishing Line Limits you might need a different setup entirely.
Gear Up with the Right Tools
While many knots can be tied with just your bare hands, having a few specialized tools can make the process significantly easier, faster, and more effective, especially when dealing with specific line types or in challenging conditions. Investing in the right gear is part of being a prepared angler.
A good pair of sharp line clippers or fishing scissors is essential for cleanly trimming tag ends. Trying to break line or use dull tools can fray the line, weakening the knot. Pliers or forceps, often called hemostats, are invaluable for gripping and pulling knots tight, especially with braided line that can be rough on your fingers, or when you're tying small knots with cold hands. Some multi-tools even come with integrated knot-tying aids or a small hook-eye cleaner for those tiny lure eyes. Knot-tying tools, which are specifically designed to help create certain knots more consistently, can also be a game-changer for beginners or those struggling with a particular knot. You can easily find high-quality versions of all these tools on Amazon, ranging from basic clippers to more elaborate knot-tying gadgets. Having these tools readily available in your tackle box means you can spend less time struggling with your gear and more time focused on the exciting prospect of landing a trophy fish.
Understanding Line Types and Knot Compatibility
The fishing line you choose plays a huge role in knot strength and performance. Not all knots are created equal for all line types. What works wonderfully for monofilament might slip miserably with braided line. Knowing the characteristics of your line and which knots pair best with it is critical for maximizing your chances of success on the water.
Monofilament
Monofilament, often just called "mono," is perhaps the most traditional and widely used fishing line, made from a single strand of plastic. It's known for its stretch, abrasion resistance, and relatively low cost. For knots, monofilament is quite forgiving. Its inherent elasticity allows the knots to cinch down well and absorb some shock without immediately breaking.
Most common knots, like the Improved Clinch, Palomar, and Uni Knot, perform exceptionally well with monofilament. The material allows the wraps to bite into each other securely, providing a strong connection. However, while it's forgiving, it's still crucial to wet your knots before cinching them tight to prevent friction damage, which can still occur with mono. Monofilament is a great choice for a wide array of fishing in Maine, from general lake fishing for bass and perch to light trolling for trout. If you're using classic gear, you'll likely be using mono, and the knots discussed earlier will serve you very well. Thinking about Best Lures for Maine Open Water Fishing? Many of them pair perfectly with monofilament setups.
Fluorocarbon
Fluorocarbon line has gained immense popularity for its near-invisibility underwater, excellent abrasion resistance, and lower stretch compared to monofilament, offering increased sensitivity. However, fluorocarbon behaves differently when tied, often requiring more attention to detail with your knots. It's stiffer and has a harder surface, which can make it more prone to slipping if knots aren't tied correctly.
When tying knots with fluorocarbon, it's even more critical to moisten the line generously before cinching to prevent friction burn, which can severely weaken this material. Knots like the Palomar and the San Diego Jam are often recommended for fluorocarbon due to their multiple wraps and secure locking mechanisms. The Uni Knot also performs well if tied meticulously. Knots that rely on a lot of friction, like the Improved Clinch, can be more prone to slipping with fluorocarbon if not tied with extra wraps and extreme care. For Maine anglers using fluorocarbon leaders for wary landlocked salmon or trout, choosing the right knot and tying it perfectly is non-negotiable. It truly makes a difference in presentation and ultimate fish-fighting strength, especially if you're exploring Trolling Techniques for Maine Lakes and need a stealthy leader.
Braided Line
Braided line, or "superline," is made from multiple synthetic fibers woven together, resulting in incredible strength-to-diameter ratio, zero stretch, and exceptional sensitivity. However, its smooth, slick surface can make it notoriously difficult for some knots to hold. Many traditional knots will simply slip right out of braided line under tension.
For braided line, knots that "bite" or cinch down very tightly on themselves are required. The Palomar Knot is hands down one of the best and most reliable knots for connecting braided line to hooks, swivels, and lures, as its double-line structure locks it securely. The Uni Knot (tied with a few extra wraps) and the San Diego Jam are also strong contenders. For connecting braided main line to a monofilament or fluorocarbon leader, the Double Uni Knot and the Albright Knot are excellent choices. Avoid simple knots that don't have multiple wraps or a self-cinching action, as these are highly likely to fail with braid. Some anglers even prefer to "double" their braided line before tying certain knots (like a Palomar) for added security. When shopping for braided line or related accessories, many quality options and specific knot-tying aids for braid can be found and reviewed on Amazon. Using the correct knots with braid is absolutely vital to harness its incredible strength and sensitivity.
Knot Comparison Table for Maine Anglers
To help you quickly reference and choose the best knot for your specific needs on Maine's diverse waters, here's a handy comparison table summarizing the knots discussed, their primary uses, and key considerations.
| Knot Name | Primary Use | Best For Line Types | Pros | Cons |
|---|---|---|---|---|
| Palomar Knot | Lure/Hook to Line | Braided, Mono, Fluoro | Extremely strong, reliable, easy to tie once learned, excellent for braid | Can be tricky with very small lure eyes, uses more line |
| Improved Clinch Knot | Lure/Hook to Line | Monofilament, Fluorocarbon | Easy to learn, good strength, versatile | Less strong than Palomar, can slip with braid/slick fluoro if not tied well |
| Uni Knot | Lure/Hook to Line, Line-to-Line, Leader Loop | All (with care for braid) | Highly versatile, strong, good for various connections | Can use a bit more line, requires enough wraps for braid |
| Blood Knot | Line-to-Line Connection | Monofilament, Fluorocarbon (similar diameter) | Very strong, slim profile, smooth through guides | Difficult to tie, especially with dissimilar lines or stiff fluoro |
| Double Uni Knot | Line-to-Line Connection (Leader to Main) | All (great for braid to mono/fluoro) | Easier than Blood Knot, good for different line types and diameters | Larger knot profile than Blood Knot |
| Albright Knot | Line-to-Line (dissimilar diameters/materials) | Braid to Mono/Fluoro, Fly line to backing | Excellent for significant diameter differences, strong | Can slip if not tied precisely, needs practice |
| Surgeon's Loop | Creating End Loops | Monofilament, Fluorocarbon | Very easy to tie, quick, strong loop | Not as compact as Perfection Loop |
| Perfection Loop | Creating End Loops (Fly Fishing Leaders) | Monofilament, Fluorocarbon | Very compact, strong, non-slip loop, perfectly aligned | Requires more practice than Surgeon's Loop |
| Dropper Loop | Creating Mid-Line Loops | Monofilament, Fluorocarbon | Allows multiple bait/lure presentations, versatile | Can weaken main line if not tied carefully, creates a "kink" |
Remember, while this table gives a quick overview, the best way to choose a knot is to understand its mechanics and practice it until you can tie it reliably and confidently. Whether you're chasing after the Maine Landlocked Salmon Bag Limits or looking to learn about Catch and Release Best Practices in Maine, the right knot is your foundational skill.
Final Thoughts on Your Knot Mastery Journey
Mastering fishing knots is an ongoing journey, not a destination. Even the most seasoned Maine anglers are constantly refining their techniques, learning new knots, or re-evaluating old favorites. The key is to approach knot tying with patience, diligence, and a commitment to perfection. Never compromise on the quality of your knots; they are truly the weakest link in your entire fishing setup, and a failure can instantly ruin what could have been an unforgettable moment.
Take the time to practice these essential knots at home. Understand why each knot works and its optimal application. Always wet your line before cinching, trim your tag ends appropriately, and regularly inspect your knots for any signs of wear or slippage. By doing so, you'll build immense confidence in your gear, allowing you to focus on the joy of fishing and the thrill of the catch. Whether you're venturing out during the Best Time of Year to Fish in Maine or trying to understand Maine Fishing Regulations Explained, a reliable knot is always in style.
Tight lines, and may your knots always hold strong against the spirited fish of Maine!
Disclaimer
The information provided in this guide is for general informational purposes only and is not intended as legal advice regarding fishing regulations. Always consult the official Maine Department of Inland Fisheries and Wildlife (MDIFW) regulations for the most current and accurate rules and laws before engaging in any fishing activities. Fishing conditions and regulations can change, and it is the angler's responsibility to stay informed.