How to Read a Fish Finder for Ice Fishing
Drilling hole after agonizing hole on the ice, shivering in the brisk Maine winter wind, only to come up empty-handed is a frustration every ice angler knows deeply. It can feel like a complete guessing game, relying on luck more than skill, and that's just plain discouraging. But what if you could actually peer beneath that icy surface and see exactly where the fish are hiding, how deep they are, and even how they're reacting to your presentation? This guide is designed to demystify your ice fishing fish finder, transforming your hardwater trips from frustrating question marks into strategic, successful endeavors.
Demystifying Your Ice Fishing Flasher or Sonar Unit
When you first get into ice fishing, the array of electronics can seem daunting. You might hear terms like "flasher" and "sonar," and wonder what the real difference is and which one is right for you. Don't worry, it's not as complicated as it sounds, and understanding the basics is the first step to unlocking their potential on the ice.
Flashers vs. LCD Sonar Displays
For decades, the classic flasher unit has been the workhorse of ice anglers, and for good reason. These units, like the popular Vexilar or Marcum models, provide real-time, instantaneous feedback. Imagine a circular display with an array of colored lights. As your transducer sends out its sonar ping and receives echoes, these echoes are displayed as colored segments around the dial. The beauty of a flasher is its simplicity and speed; there's virtually no lag, allowing you to see your jig descend, fish approach, and bites happen in the blink of an eye. The different colors indicate the strength of the return signal, giving you a clue about the size or density of what's beneath.
On the other hand, modern LCD sonar units (often referred to as graph units) offer a more detailed, historical view of the water column. Brands like Humminbird with their Ice Helix series or Garmin's Striker series have made significant inroads into the ice fishing world. These units display a scrolling history of the sonar returns, much like what you'd see on an open-water boat unit. You get a clearer picture of bottom contours, structure, and how fish have been moving over time. While they might have a slight delay compared to a flasher, their high-resolution screens and advanced features, like GPS mapping, can be incredibly valuable, especially on unfamiliar bodies of water or when targeting specific depths on a large lake like Moosehead Lake. Each type has its devoted followers, and many anglers even run both simultaneously for the best of both worlds.
How Sonar Works Through the Ice
At its core, a fish finder, whether it's a flasher or an LCD unit, uses sound waves to "see" underwater. Your unit's transducer sends out a pulse of sound (sonar) into the water. When this sound wave hits something – be it the lake bottom, a school of baitfish, or a trophy lake trout (or "togue" as we often call them here in Maine) – it bounces back to the transducer. The unit then measures the time it takes for that echo to return and, knowing the speed of sound in water, calculates the depth of the object. Stronger echoes indicate a denser object, which is why a big fish shows up differently than a tiny minnow.
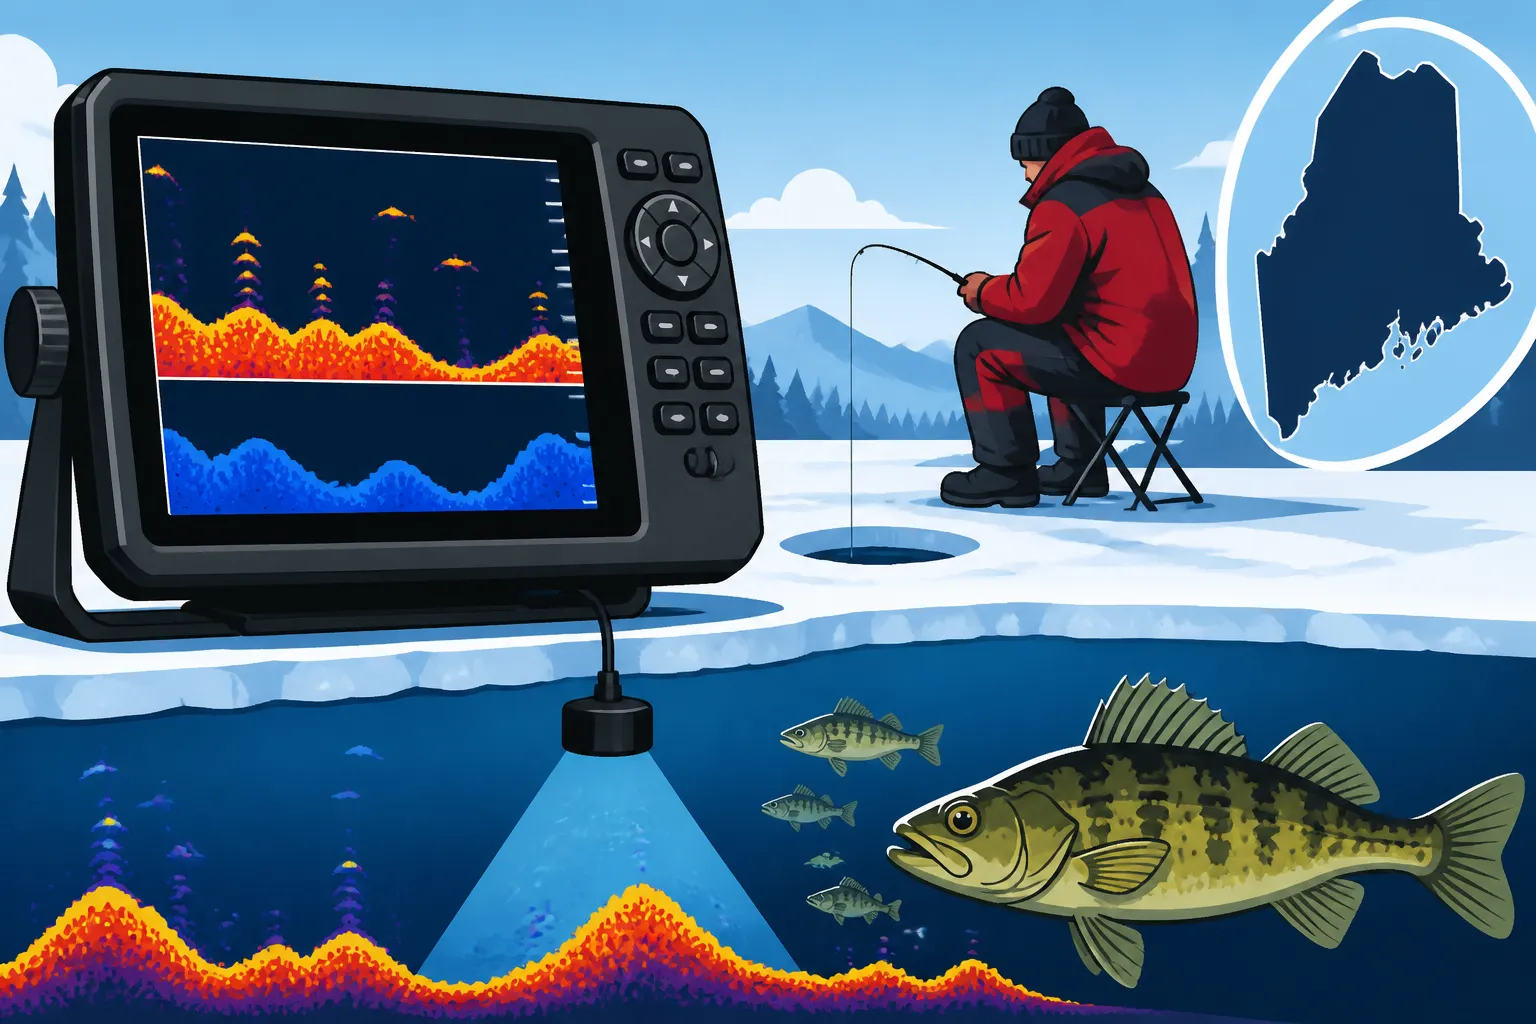
The magic happens in how these echoes are translated onto your screen. For ice fishing, your transducer is usually suspended just below the ice in the hole you've drilled. It sends a cone-shaped beam of sonar waves downward. This cone expands as it goes deeper, meaning the deeper you fish, the wider area your unit is scanning. Understanding this cone angle is crucial because it tells you how much of the water column you're actually "seeing" around your lure. A narrow cone might be great for precision in shallow water, while a wider cone helps you scan a broader area in deeper sections of Sebago Lake. The advancements in sonar technology mean these units are incredibly sensitive, picking up even the slightest movements of fish or bait.
Decoding the Display: What Those Colors and Lines Really Mean
Once you've got your fish finder powered up and your transducer in the water, the display starts to tell a story. Learning to interpret these visual cues is where the real magic happens, allowing you to identify the bottom, differentiate between weeds and fish, and pinpoint your lure.
Understanding the Bottom, Weeds, and Structure
The first thing you'll usually identify on your fish finder is the bottom. On a flasher, the bottom typically appears as a wide, consistent band of strong color (often red, indicating a very strong return) at the bottom of the display. If the bottom is hard, like rock or gravel, this band will be crisp and well-defined. If it's soft, mucky, or muddy, the band might appear a little softer, less defined, or even have a 'tail' or secondary weaker signal just below it, indicating the sonar is penetrating slightly into the soft sediment. On an LCD screen, the bottom will be represented by a solid, thick line, often filled in to show density. You might see variations in thickness or texture that reveal changes in bottom composition.
Above the bottom, you might see narrower, less intense bands or lines. These are often weeds, submerged brush, or other forms of underwater structure. On a flasher, weeds might show up as varying shades of green or yellow, often appearing erratic or "fuzzy" compared to the solid bottom. They'll extend upwards from the bottom. On an LCD screen, weeds will look like vertical lines or clumps, sometimes with a distinctive "tree-like" shape, depending on the weed type. Identifying structure is crucial because fish, especially species like bass and crappie, love to hang out in and around cover. Even species like brook trout and landlocked salmon will use structure as ambush points or resting areas. If you're targeting perch, finding submerged weed beds can be key to a successful outing.
Identifying Fish, Baitfish, and Your Lure
This is the moment of truth for most anglers! On a flasher, fish typically appear as distinct, narrower colored marks. The color will indicate the strength of the return. A small segment of green might be a baitfish or a smaller panfish. A thicker, more persistent segment of yellow or orange could indicate a decent-sized fish. And a bold, solid red segment often means a larger fish or a fish directly under your transducer. The key is how long the mark persists and how strong its color is.
On an LCD unit, fish are often depicted as "arches." As a fish moves through your sonar cone, the distance from your transducer changes, creating that classic arch shape. The size and thickness of the arch can give you a clue about the fish's size. Smaller arches or mere dots usually mean baitfish or smaller targets. Pay close attention to the depth of these arches. Are they hugging the bottom? Suspended mid-water? Are they moving up or down? This movement tells you about their activity level. For example, if you see a fish rising quickly towards your lure, get ready for a strike! You can find a wide range of highly-rated fish finders and related accessories, including high-capacity batteries and transducer arms, on Amazon to help you get started or upgrade your setup.
Your lure, thankfully, is usually the easiest thing to spot. It will appear as a very thin, distinct line or mark that you can control. As you lower your jig, you'll see its mark descend on the screen. When you jig, you'll see that mark move up and down in response. This allows you to position your lure precisely in the strike zone, right above or even within a school of fish. Seeing your lure and a fish on the same screen, interacting, is what makes fish finders such a game-changer for ice fishing.
Here's a quick reference for typical flasher color interpretations:
| Flasher Color | Signal Strength | Interpretation | Common Example |
|---|---|---|---|
| Green | Weakest | Small object, soft bottom, or edge of cone | Small baitfish, light weeds, soft mud, far away fish |
| Yellow | Medium | Moderate-sized object, medium density | Panfish, medium-sized fish, denser weeds |
| Orange | Stronger | Larger object, harder bottom, closer to center | Good-sized fish, strong weed clumps, hard bottom |
| Red | Strongest | Large fish, very hard bottom, directly under cone | Trophy fish, rock bottom, dense school of fish |
Note: Color interpretations can vary slightly by manufacturer and model, always check your unit's manual.
Mastering Your Finder on Maine's Icy Waters: Settings, Strategies, and Troubleshooting
Having the gear is one thing; mastering it on the ice, especially in Maine's often challenging conditions, is another. Fine-tuning your settings and understanding common issues can make all the difference.
Optimizing Your Settings for Maine Ice Fishing Conditions
The default settings on your fish finder are usually a good starting point, but conditions change, and so should your settings.
- Gain/Sensitivity: This is perhaps the most important setting. It controls how sensitive your unit is to echoes. If your screen is cluttered with too much "noise" (random specks), turn the gain down. If you're seeing nothing but the bottom, even when you know fish are present, turn it up. In deep, clear lakes like some parts of Rangeley Lakes, you might run higher sensitivity. In shallower, weedier ponds, you might need to dial it back to avoid clutter. The goal is to see your lure clearly and any fish in the vicinity without excessive interference.
- Zoom: Many LCD units and even some flashers offer a zoom function. This allows you to magnify a specific depth range, giving you a more detailed view of what's happening near the bottom or around a suspended school. If you're targeting fish holding tight to the bottom, zooming in can help you see their subtle movements and your lure's presentation more clearly.
- Interference Rejection: When you're fishing in a shanty village on a popular lake or participating in a derby like the one on China Lake, you're bound to encounter interference from other anglers' sonar units. Most fish finders have an interference rejection setting. Cycle through the different levels until your screen clears up. This is a lifesaver for maintaining a readable display when fishing in close quarters. Remember, you might need to adjust this as other anglers move in or out of your immediate area.
- Cone Angle: Some advanced units allow you to adjust the sonar cone angle. A narrower cone (e.g., 9-20 degrees) provides more detail and is excellent for precise lure placement, especially in deeper water. A wider cone (e.g., 40-60 degrees) scans a larger area, which is great for finding fish quickly or checking for schools of baitfish. Knowing the differences can help you refine your approach based on the specific body of water and target species.
Practical Strategies for Locating and Catching Fish
A fish finder isn't just about seeing fish; it's about seeing how they react and using that information to your advantage.
- Vertical Presentation is Key: Unlike open water where you might cast and retrieve, ice fishing is primarily a vertical game. Your fish finder excels here because it shows you exactly where your lure is in relation to the fish. If fish are hugging the bottom, drop your lure right to them. If they're suspended 10 feet off the bottom, bring your lure up to their level. This precision dramatically increases your chances.
- Experiment with Depth and Action: Don't just leave your lure at one depth. Watch your fish finder. If fish approach but don't commit, try slowly raising your lure, making it look like a fleeing baitfish. Or, try a more aggressive jigging motion. You'll see their reactions – whether they rise to investigate, shy away, or dart in for a strike. This real-time feedback is invaluable for figuring out what the fish want right now.
- Find the "Dead Zone": Sometimes, you'll see fish on the screen that seem completely uninterested in your lure, no matter what you do. This might be a "dead zone" of inactive fish. Instead of wasting time, use your auger (perhaps a reliable one you picked up from Amazon) and drill new holes until you find active fish that respond to your presentation. This is especially true when targeting species like togue or landlocked salmon, which can be finicky.
- Identify Baitfish Schools: If your fish finder shows dense clouds of smaller marks, you've likely found a school of baitfish. Where there's bait, there are usually predators. Work the edges of these bait balls, or even drop your lure right through them. Big brook trout or landlocked salmon will often be lurking nearby, waiting for an easy meal. This knowledge can save you hours of fruitless fishing on a new spot. This strategy is also effective when learning How to Fish for Togue Through the Ice.
- Mark Waypoints: Many modern LCD units come with GPS capabilities. If you find a productive area – a sharp drop-off, a patch of structure, or where you caught a fish – mark it as a waypoint. This allows you to return to that exact spot on future trips. This is particularly useful on vast bodies of water where finding the same spot again can be a challenge.
Common Troubleshooting and Best Practices
Even with the best gear, issues can arise. Knowing how to quickly troubleshoot them can save your day on the ice.
- No Readout or Inconsistent Readings: First, check your transducer. Is it properly submerged? Is it level in the hole? Air bubbles trapped under the transducer face can prevent it from sending and receiving signals effectively. Clear any slush or air. Also, ensure your battery is charged; a weak battery can lead to erratic performance. If you're having trouble with your transducer positioning, consider a portable transducer arm or a float, many of which are available on Amazon.
- Interference: As mentioned, use your interference rejection settings. If that doesn't work, try moving a few feet away from other anglers if possible. Sometimes, even the presence of metal items like an ice fishing shack or a metal bucket too close to the transducer can cause minor interference. Make sure to check out the specific guidelines in the Maine Ice Fishing Rules Guide to ensure you're compliant with all regulations.
- Battery Life: Cold weather significantly impacts battery performance. Always start with a fully charged battery. Consider carrying a spare, or invest in a high-capacity lithium battery, which performs better in the cold and provides longer run times. Keeping your battery warm (e.g., in an insulated bag) can also extend its life.
- Protect Your Gear: These units are investments. Keep them dry, especially when moving between holes or packing up. A good soft-sided case will protect the screen and electronics from bumps and moisture. When you're done for the day, ensure your transducer is clean and free of ice buildup before storing it. Proper care will ensure your unit is ready for your next trip, whether you're targeting perch, salmon, or the elusive togue. Planning your trip with appropriate gear, including the Best Rods for Ice Fishing and considering Early Ice Safety Tips for Maine Anglers, will make your experience more enjoyable and successful. Remember to check how many lines are legal for Maine ice fishing before you go out.
By understanding how your fish finder works, what its display means, and how to optimize its settings, you'll gain a significant advantage on the ice. No more drilling blind! You'll be able to locate fish, observe their behavior, and adjust your tactics in real-time, making your Maine ice fishing adventures far more productive and enjoyable. Whether you're scouting new territory in the Belgrade Lakes region or trying to pinpoint a monster on Sebago, your fish finder will be your most valuable tool.
Disclaimer
The information provided in this guide is for general informational purposes only and is not intended to be legal advice. Fishing regulations, license requirements, and safety guidelines can change. Always consult the most current official regulations from the Maine Department of Inland Fisheries and Wildlife (MDIFW) before any fishing trip. Adherence to all local and state laws is the responsibility of the angler. Fishing on ice carries inherent risks; always prioritize safety and check ice conditions thoroughly.