Best Sonar Settings for Finding Fish
Ever stared at your fish finder screen, seeing a jumble of lines and colors, and wondered if it was actually helping you find fish or just confusing you more? Many of us have been there, feeling like our expensive sonar unit is just another piece of gear taking up space rather than a powerful ally. This comprehensive guide is here to demystify those complex sonar settings, empowering you to adjust your unit for optimal fish finding in Maine's diverse waters, from our vast lakes to our winding rivers.
Understanding the Foundation: How Sonar Works in Maine Waters
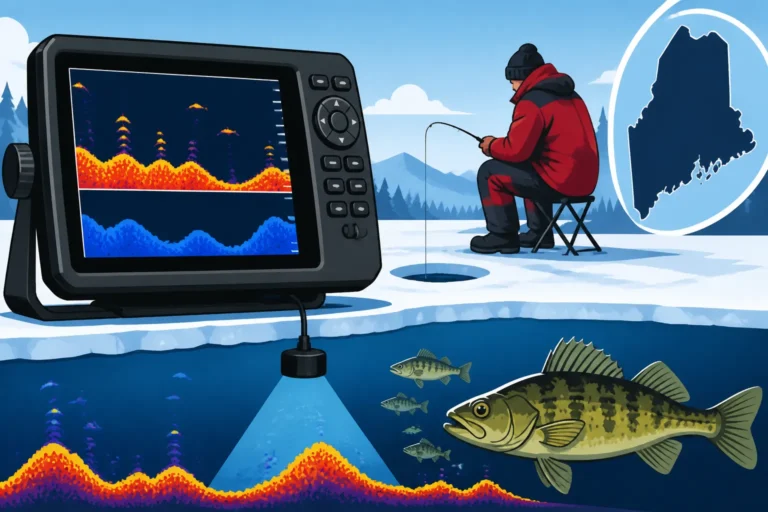
Before we dive into tweaking knobs and adjusting percentages, it’s really helpful to grasp the basic science behind your fish finder. Imagine your boat sending out sound waves, like shouting into a canyon and listening for the echo. Your sonar unit does essentially the same thing, but underwater. It sends a pulse of sound, which bounces off objects—like the lake bottom, underwater structure, baitfish, or that trophy landlocked salmon—and returns to your unit. The time it takes for the echo to return, and its strength, tells your fish finder how far away and how dense an object is.
The Mighty Transducer and its Cone Angle
The transducer is the unsung hero of your sonar system. It's the part that actually sends and receives those sound waves. Think of it as the ears and mouth of your fish finder. Its placement on your boat is crucial; a poorly mounted transducer can lead to a fuzzy, unreliable signal, making all those fancy settings useless. When mounting, ensure it's in clean water, free from turbulence, which can create air bubbles that scatter the sound waves and create "noise" on your screen.
Every transducer has a specific "cone angle," which describes how wide the sound beam spreads as it travels through the water. A narrow cone angle, typically around 20 degrees or less, is fantastic for seeing deep into the water column and identifying individual fish or subtle bottom features in deep lakes like Moosehead Lake or Sebago Lake. However, it covers a smaller area. A wider cone angle, say 45 to 60 degrees, covers a much broader area, making it excellent for searching large expanses of shallow water or locating bait balls, but it sacrifices some detail and might struggle with target separation in deeper water. Many modern units, which you can often find great deals on through retailers like Amazon, offer dual-beam or even multi-beam transducers, allowing you to switch between cone angles or view multiple simultaneously.
The Power of Frequency in Detecting Fish
Sonar frequency, measured in kilohertz (kHz), dictates how detailed your sonar image will be and how deep it can penetrate. This is a critical concept, especially when fishing the varied depths and structures of Maine.
- High Frequencies (e.g., 200 kHz): These frequencies provide incredibly detailed images, showing you crisp targets and excellent separation between fish and structure. They're ideal for shallower waters, say up to 100 feet, where you're trying to pinpoint smallmouth bass holding tight to a rock pile in the Belgrade Lakes, or identify individual brook trout near the bottom of a smaller pond. The downside is that high frequencies don't penetrate as deep and are more susceptible to noise and interference.
- Low Frequencies (e.g., 50 kHz): Lower frequencies are your workhorses for deep water. They can punch through hundreds, sometimes thousands, of feet of water, making them perfect for finding togue in the abyssal depths of Moosehead Lake or searching for schools of baitfish far below the surface. While they offer great depth penetration, the trade-off is less detail and poorer target separation. A fish at 500 feet on a 50 kHz signal might appear as a blob, whereas on a higher frequency, you might distinguish it more clearly if it were shallower.
- Chirp Sonar: Many advanced fish finders today feature CHIRP (Compressed High-Intensity Radiated Pulse) sonar. This technology is a game-changer because it doesn't just send a single frequency; it sends a continuous sweep of frequencies, from low to high, creating a much broader spectrum of information. This results in incredibly clear, high-resolution images with superior target separation at all depths. If you're serious about your Maine fishing, a CHIRP-enabled unit is a worthwhile investment.
Essential Sonar Settings and Their Practical Application
Now that we understand the basics, let's get into the nitty-gritty of the settings themselves. Each setting plays a vital role in transforming raw sonar data into a readable, useful display.
Sensitivity or Gain: The Eye of the Beholder
Sensitivity (sometimes called Gain) is arguably the most crucial setting on your fish finder. It controls how much detail your unit displays by adjusting the strength of the returning echoes it will "hear." Think of it like the volume knob on a radio: too low, and you miss faint signals; too high, and you get a lot of static.
- Too Low: If your sensitivity is too low, your screen will look clean, perhaps too clean. You'll miss faint echoes from smaller fish, baitfish schools, or subtle changes in bottom composition. You might only see the bottom and very large, close targets.
- Too High: Crank the sensitivity too high, and your screen will become cluttered with "noise"—random dots and lines caused by turbulence, air bubbles, or electrical interference. While you might pick up more targets, it becomes nearly impossible to distinguish real fish from the clutter.
The sweet spot for sensitivity is typically just below the point where you start seeing too much clutter. A good starting point is usually around 80-90% of your unit's maximum sensitivity, then you can dial it back until the screen is mostly clean but you can still see faint bottom returns or small targets. This is a dynamic setting; you'll find yourself adjusting it constantly as you move into different depths or conditions on lakes like China Lake or Damariscotta Lake.
Depth Range: Focusing Your View
The depth range setting determines the upper and lower limits of the water column displayed on your screen. While it might seem obvious, many anglers leave it on auto, which isn't always optimal.
- Auto Range: Convenient for cruising, but often shows more water than you need. If you're fishing in 30 feet of water, having a range set to 100 feet means your fish targets will be very compressed and hard to see.
- Manual Range: This is where you gain control. If you're fishing a specific depth, like 20-40 feet for smallmouth bass or landlocked salmon suspended at 60 feet, set your range to encompass just that zone. For example, if fish are suspended at 30 feet in 50 feet of water, set your range from 0-60 feet to magnify that crucial area and make targets much easier to identify. This is especially helpful when trolling for salmon or togue and need to keep a close eye on your lures in relation to fish. For deeper fishing, understanding the water column is key, and setting your range manually helps immensely when determining "How Deep Should You Troll for Salmon in Summer?"
Noise Rejection and Surface Clarity: Cleaning Up the Screen
These settings help filter out unwanted interference, giving you a cleaner picture.
- Noise Rejection: This feature helps eliminate electrical interference from your boat's engine, trolling motor, or other electronics. If you see persistent vertical lines or flickering on your screen, try increasing the noise rejection. Be cautious not to set it too high, as it can sometimes filter out actual fish signals.
- Surface Clarity/Rejection: The top few feet of the water column can be turbulent due to waves, prop wash, or air bubbles. Surface clarity (or rejection) settings minimize this "surface clutter," allowing you to see targets closer to the surface. This is particularly useful when fishing shallow waters or when fish are feeding near the top.
Color Palette: Visualizing the Data
Modern fish finders offer a variety of color palettes. While largely a matter of personal preference, different color schemes can make targets stand out more clearly. Generally, warmer colors (red, yellow, orange) represent stronger signals (larger fish, harder bottom), while cooler colors (blue, green) indicate weaker signals (smaller fish, softer bottom). Experiment with different palettes to find one that offers the best contrast and readability for your eyes and the lighting conditions. Many anglers swear by palettes that offer high contrast between fish arches and the bottom for quick identification.
Tailoring Sonar Settings for Maine's Diverse Fishing Scenarios
Maine offers a incredible variety of fishing environments, and what works on one lake or river might not be ideal for another. Adjusting your sonar settings to match the conditions and your target species is key to consistent success.
Shallow Water Fishing (Under 50 feet)
When you're poking around rocky shorelines, exploring weed beds for largemouth bass, or drifting over shallow flats, your sonar settings need to be optimized for detail and coverage.
- Frequency: Stick to higher frequencies (e.g., 200 kHz or high CHIRP) for maximum detail and target separation. This will help you distinguish between a submerged log and a fish holding tight to it.
- Cone Angle: A wider cone angle (45-60 degrees) is often beneficial here to cover more ground quickly, especially when searching for schooling fish or tracking contour lines. If you're really trying to pick apart specific pieces of cover, you might switch to a narrower cone.
- Sensitivity: Keep it relatively high, but back it off just enough to eliminate excessive clutter. You want to see subtle bottom changes, individual fish, and the edges of weed lines.
- Depth Range: Set your manual range to just slightly below the current depth (e.g., 0-30 feet in 20 feet of water) to magnify the water column and make targets more prominent.
Imagine you're targeting smallmouth bass on a rocky shoal in Sebago Lake. A high-frequency, wide-cone setting will help you scan a large area quickly, while a high sensitivity will make those individual bass holding near the rocks pop out on your screen. You're essentially looking to "read the lake structure for Maine bass" in a very detailed way.
Deep Water Fishing (Over 50 feet)
Heading out to chase togue in the depths of Moosehead or Rangeley Lakes, or suspended landlocked salmon, requires a different approach to your sonar.
- Frequency: This is where lower frequencies (50 kHz or low CHIRP) shine. They have the power to penetrate deep water, ensuring your signal reaches the bottom and returns reliably. Many units will automatically use a mix, but understanding the benefit of lower frequencies is crucial.
- Cone Angle: A narrower cone angle (e.g., 20 degrees or less) is generally preferred in deep water. While it covers less area, it provides better detail and target separation at extreme depths, making it easier to pick out individual fish from the vastness.
- Sensitivity: You'll likely need to increase your sensitivity quite a bit in deep water to pick up faint returns from far-off targets. Again, adjust it until you see just a touch of noise, then back it off slightly.
- Depth Range: Use manual range, setting it to encompass the depths you're primarily fishing or where baitfish are schooling. If you're marking fish at 80 feet in 150 feet of water, set your range to 0-100 feet to maximize that key zone. Understanding "What Depth Do Togue Hold at in Summer?" becomes much easier with a properly ranged screen.
Structure Fishing and Bottom Composition
Maine lakes are riddled with humps, ledges, rock piles, and old river channels. Your sonar can be your best friend in mapping these out.
- DownScan/SideScan Imaging: If your unit has these features, they are invaluable for structure. DownScan provides photo-like images directly below your boat, making it easy to discern rock from wood, or a bait school from a submerged tree. SideScan allows you to scan wide areas to either side of your boat, revealing structure and fish that you might otherwise drive right over without seeing. This is how you "How to Find Drop-Offs on a New Lake" effectively.
- Adjusting Color Palette: Experiment with palettes that offer strong contrast for bottom returns. A hard bottom (rock, gravel) will typically show as a thick, intense color band, while a soft bottom (mud, silt) will appear thinner and less vibrant.
- Sensitivity for Structure: High sensitivity helps highlight subtle changes in bottom composition and detect fish hugging the bottom.
Ice Fishing Specifics
Maine's ice fishing scene is vibrant, and even under the ice, sonar plays a huge role. Flasher units are common, but many open-water fish finders can be adapted for ice fishing.
- Narrow Cone Angle: For ice fishing, you're usually fishing a very specific hole. A narrow cone angle is excellent for this, as it minimizes interference from other anglers' transducers and gives you a clear picture of what's directly beneath your hole.
- Manual Depth Range: Set your range to cover only the water column from the ice down to the bottom, often emphasizing the lower third where fish might be holding.
- Zoom Function: Utilize your unit's zoom function to magnify the bottom 5-10 feet. This allows you to see your bait, individual fish, and how fish are reacting to your jigging techniques. For instance, when using "Jigging Techniques for Togue" through the ice, seeing the fish approach your bait is incredibly exciting and informative.
When learning "How to Read a Fish Finder for Ice Fishing," remember that seeing your lure and the fish on the same screen is a massive advantage.
Interpreting Your Sonar Screen: What Those Marks Really Mean
Okay, you've adjusted your settings, and now your screen is showing… something! Learning to interpret those marks is the next crucial step.
Arches: The Classic Fish Signature
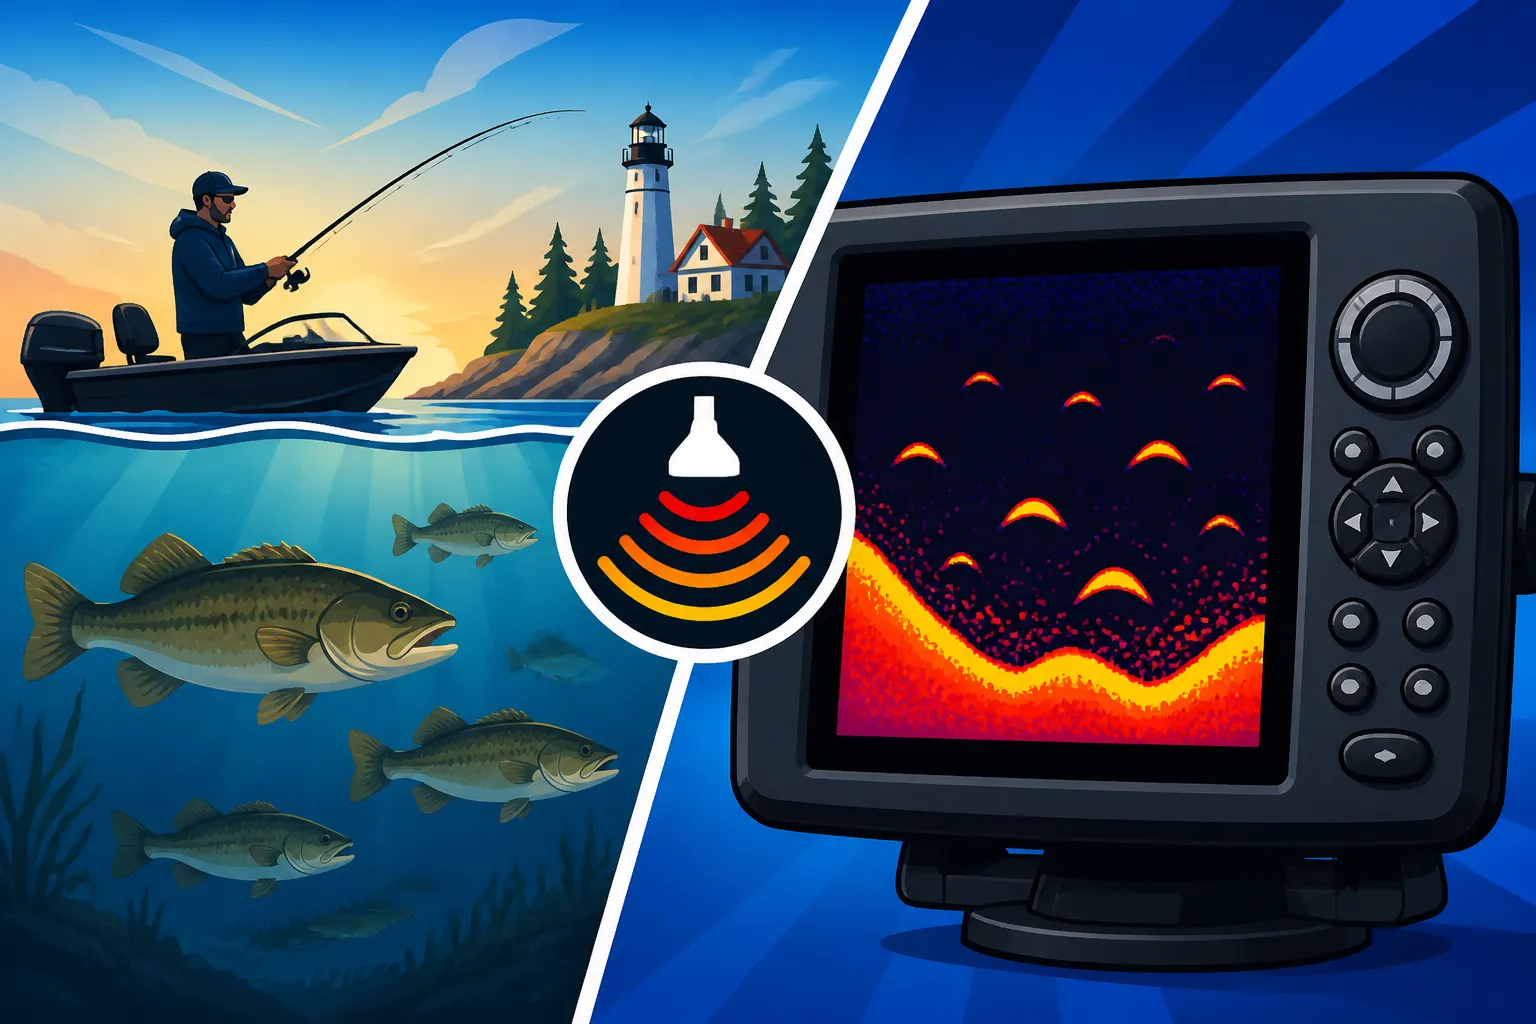
The iconic "fish arch" is what most anglers hope to see. It's created as your boat moves over a fish. As the fish enters the sonar cone, it appears on one side of the arch, is strongest when directly under the boat (the top of the arch), and then disappears on the other side.
- Size Matters: The thickness and length of an arch can indicate the size of the fish. A thick, well-defined arch usually means a larger fish.
- Broken Arches: Sometimes you'll see half-arches or broken lines. This can mean you only caught the edge of a fish, or the fish moved quickly through the cone. Don't dismiss them!
- Depth: The depth at which you see arches tells you how deep the fish are holding. This is critical for setting your lures or bait at the correct depth, especially when targeting suspended fish like salmon or togue.
Bait Balls and Schools of Fish
Baitfish will often appear as dense clouds or clumps on your screen. These can range from small, tight clusters to massive, dispersed clouds covering a huge portion of the water column. Where there's bait, there are usually predatory fish nearby.
- Predator Marks: Look for larger, distinct arches or lines on the edges of, above, or below these bait balls. These are often the salmon, bass, or togue that are feeding on the bait.
- Density: The denser the bait ball appears, the more concentrated the baitfish are. This is often a sign of active feeding.
Thermoclines: Where the Fish Hang Out
In many of Maine's deeper lakes, water stratifies into layers of different temperatures during the warmer months. These layers are called thermoclines. Your sonar can often detect these, appearing as a hazy, horizontal line on your screen.
- Why They Matter: Fish are highly sensitive to temperature and often congregate around the thermocline, especially cold-water species like salmon and trout, which seek cooler, oxygen-rich water. "How to Fish Deep Water for Summer Trout" often involves finding this layer.
- Finding Fish: If you're marking a thermocline, focus your efforts around that depth. Fish might be holding just above, below, or directly within this layer. Knowing "What Depth Do Landlocked Salmon Hold at in Summer?" or "What Depth Do Togue Hold at in Summer?" often comes down to finding this critical temperature zone.
Bottom Composition and Structure
Your sonar can tell you a lot about the bottom.
- Hard Bottom: A thick, bright bottom return typically indicates a hard bottom, like rock or gravel. This is often where fish will feed or ambush prey.
- Soft Bottom: A thinner, less intense bottom return usually means a soft bottom, like mud or silt. While some fish will cruise these areas, they often prefer adjacent hard bottom or structure.
- Underwater Structure: Humps, drop-offs, submerged trees, and rock piles will all show up clearly with properly adjusted sonar. Fish love structure for cover, ambush points, and foraging opportunities. This is vital when "Reading Lake Structure for Maine Bass."
Here's a quick reference table for common sonar settings and scenarios:
| Scenario | Frequency | Cone Angle | Sensitivity/Gain | Depth Range | Notes |
|---|---|---|---|---|---|
| Shallow Water | High (200 kHz/High CHIRP) | Wider (45-60 deg) | High | Manual (0-30 ft) | Focus on detail and broad coverage for bass and panfish. |
| Deep Water | Low (50 kHz/Low CHIRP) | Narrow (10-20 deg) | High | Manual (custom) | Penetrate deep; good for togue, salmon. Adjust based on fish depth. |
| Structure Fishing | High/DownScan/SideScan | Varies | High | Manual (local) | Identify rock piles, ledges, submerged trees. Use imaging modes. |
| Suspended Fish | Varies (often Mid/Low CHIRP) | Narrow | High | Manual (fish depth) | Focus on the water column where fish are holding, ignore bottom. |
| Ice Fishing | High (200 kHz) | Narrow (7-20 deg) | High | Manual (ice to bottom) | Magnify bottom 5-10ft using zoom for lure and fish interaction. |
Troubleshooting Common Sonar Issues on Maine Waters
Even with the best units and settings, you might encounter issues. Don't throw your fish finder overboard just yet!
My Screen is Full of Static and Clutter!
This is a classic sign of your sensitivity being too high or electrical interference.
- Solution: First, try reducing your sensitivity or gain in small increments until the screen clears up, but you can still see a clear bottom line. If that doesn't work, check your noise rejection settings. Ensure all electrical connections are clean and tight. Sometimes, turning off other electronics on your boat (especially trolling motors or pumps) one by one can help identify the source of interference. If you purchased your unit from Amazon, check for specific troubleshooting guides for your model.
I Can Only See the Bottom, No Fish!
This suggests your sensitivity is too low, or you're using the wrong frequency/cone angle for the depth.
- Solution: Gradually increase your sensitivity. Ensure you're using an appropriate frequency for the depth you're fishing – higher frequencies for shallow, lower for deep. If you're in very deep water, a wider cone might miss smaller targets at range, so try a narrower one. Remember that some fish species, like certain types of bottom dwellers, are harder to mark clearly.
My Sonar Image is Choppy or Disappearing at Speed!
This is almost always a transducer issue.
- Solution: Check your transducer mounting. It might be too high, causing it to lose contact with the water, or it could be in turbulent water caused by your hull or engine. Even a slight angle can disrupt the signal. Ensure it's clean and free of marine growth. A good, clean signal is fundamental, so double-check those "Maine Open Water Line Limits" and your transducer setup to ensure nothing is interfering.
The Depth Reading is Incorrect or Fluctuates Wildly!
Again, often a transducer problem or interference.
- Solution: Verify your transducer is firmly mounted and submerged correctly. Check for air bubbles passing under it. Sometimes, strong currents or dense weed beds can temporarily distort readings. If you have an option for a different frequency, try switching it.
My Screen is Frozen or Unresponsive!
Like any electronic device, fish finders can sometimes glitch.
- Solution: Try a hard reset (consult your unit's manual for specific instructions). Ensure your software is up to date. Sometimes, simply powering off and restarting the unit will resolve minor issues.
Mastering your sonar is a journey, not a destination. Maine's dynamic waters mean constant adaptation, but with a solid understanding of these settings and a willingness to experiment, you'll soon be reading the underwater world like a seasoned pro. Good luck out there, and tight lines!
Disclaimer
This article is for general informational purposes only and does not constitute professional advice. Laws, prices and regulations vary by location and change over time. Consult a qualified professional for guidance on your specific situation.